• Can't post after logging to the forum for the first time... Try Again - If you can't post in the forum, sign out of both the membership site and the forum and log in again. Make sure your COG membership is active and your browser allow cookies. If you still can't post, contact the COG IT guy at IT@Concours.org.
  • IF YOU GET 404 ERROR: This may be due to using a link in a post from prior to the web migration. Content was brought over from the old forum as is, but the links may be in error. If the link contains "cog-online.org" it is an old link and will not work.

Murph's C10 lowering pegs

loukoncor5459

Guest
Guest
Hi all,
I was amazed and how quickly I received my C10 Lowering pegs. Only problem, no instructions. I am going to pick up and new to me 86 Connie next weekend and want to swap out the stockers for these before I leave. What tools do I need? any additional bolts or anything?

thanks for any help

Lou
 
IIRC:

The left side needs the entire foot peg and foot peg bracket removed to allow the pin to come off as I recall.

The right side should allow the pin to be removed while in place.

The knee savers from Murphs use the OEM pins but do not use the springs you'll find on the OEM pegs.


Tips:

- Be mindful of the C clips so they don't fly off into some unknown place!

- If the right bracket needs to be removed, its a 2 piece setup. The bottom bolt is sometimes hard to find but it is there.


You will need:

- A 6mm hex (allen) head wrench or socket to get the left bracket off. (same for the right if it comes to that)

- A couple flat blade screwdrivers to get the 'C' clip off the pins that hold the pegs on and to encourage the pins to come out.

- A pliers or channel locks to press the 'C' clip back in place once pegs are swapped.
 
It may be possible to remove the slave cylinder's clevis pin and lock nut without removing anything. Its been quite a while since I did this, but I recall I couldn't find enough room to maneuver to to get clevis pin's cotter pin out and just removed the entire bracket - its only two bolts. You may need to remove the slave (two more 6mm hex bolts) to spin the clevis fork. You may need to separate the bracket to temporarily pull the brake pedal off its shaft.

The assembly is removed with two 6mm allen bolts, then separated with two more 6mm allen bolts accessible from the back of the unit.

You will need open end wrenches to adjust the the shifter turnbuckle and brake pedal adjustment, and to remove the lock nut on the right rear brake side to allow enough room to adjust for the longer reach. Don't recall sizes - just bring all your standard metric sizes 10, 12, 14 (maybe 17 or a crescent wrench for the plastic brake switch lock nut).

Brake switch can be adjusted without removing anything, just R&R the wires further up the frame under the side cover to avoid to much twist in the wires.

Additional links that may be helpful:

https://forum.concours.org/index.php?threads/is-there-a-way-to-adjust-the-rear-brake-pedal.45406/

https://forum.concours.org/index.php?threads/rear-brake-pedal-adjustment.13698/

http://www.zggtr.org/index.php?topic=283.0

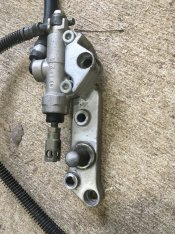
Here's what the inside of the two part rear brake bracket assembly looks like once separated, showing the adjustment rod, clevis and clevis lock nut (which you will probably need to remove to get enough adjustment). No worry to remove it as once the clevis pin is installed, there's no way for anything to rotate. You can also see the inside and outside bolt holes mentioned above.
IMG_4964.JPG
T
 
Last edited:
Top