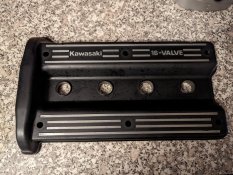
• Can't post after logging to the forum for the first time... Try Again - If you can't post in the forum, sign out of both the membership site and the forum and log in again. Make sure your COG membership is active and your browser allow cookies. If you still can't post, contact the COG IT guy at IT@Concours.org.
  • IF YOU GET 404 ERROR: This may be due to using a link in a post from prior to the web migration. Content was brought over from the old forum as is, but the links may be in error. If the link contains "cog-online.org" it is an old link and will not work.

Re: What did You Do to your C-10 Today?

I hate to admit this, but Crag; That looks REALLY good!

Ride safe, Ted
I'm glad I'm not the only one who succumbed to temptation in sanding down the ribs on the GPZ cover. I painted it semi-gloss black and intended to leave it solid as the stock Connie cover was, but it was just too much to resist to give if the sporty treatment, even if I'm the only one who sees it during maintenance.
 
Y'all got my interest up.
Found these;

 
Last edited:
Y'all got my interest up.
Found these;

Those all look good.

This is the seller I bought mine from. I think I paid about $70 total to my door. I've bought several things from them now, for both the Connie and my ZX600-C, and have been pleased with the experience. Prices and shipping have been fair, and they ship out pretty quick. Just be prepared that your stuff will probably sit in custom clearance for 1-2 weeks. I usually got my stuff in 3-4 weeks, though.

 
Here's what mine looked like before and after paint. I cleaned it really well with Simple Green Pro and a stainless wire brush, then acetone. I masked it off then primed with Rustoleum High-Heat primer, then use the high-temp BBQ paint. I cured it for an hour at 450 deg in the kitchen oven the next day. I sanded it after that to raw aluminum on the fins and lettering. I can't report yet on the durability, but it looks good!
 

Attachments

  • PXL_20231125_152052615.MP (1).jpg
    PXL_20231125_152052615.MP (1).jpg
    185.5 KB · Views: 25
  • PXL_20231129_065756707 (1).jpg
    PXL_20231129_065756707 (1).jpg
    216.4 KB · Views: 27
  • PXL_20231225_210854369.jpg
    PXL_20231225_210854369.jpg
    199.3 KB · Views: 27
(Believe it or not) I wuz being good.
I was minding my own business. (Just reading and replying to the Forum)
,,,,,,,,,and then y'all (rotten individuals) went and posted photo's...
So I bought one.
(Don't tell my wife)

Ride safe, Ted


Update 1/17/24; Still waitin' for delivery. Supposedly, it's now in Willis TeXaS.
 
Last edited:
(Believe it or not) I wuz being good.
I was minding my own business. (Just reading and replying to the Forum)
,,,,,,,,,and then y'all (rotten individuals) went and posted photo's...
So I bought one.
(Don't tell my wife)

Ride safe, Ted

Don't tell my WIFE......this might be sum gud info to use in the future.....for bartering that is.
 
Here's what mine looked like before and after paint. I cleaned it really well with Simple Green Pro and a stainless wire brush, then acetone. I masked it off then primed with Rustoleum High-Heat primer, then use the high-temp BBQ paint. I cured it for an hour at 450 deg in the kitchen oven the next day. I sanded it after that to raw aluminum on the fins and lettering. I can't report yet on the durability, but it looks good!
I went thru the same seller. Well packaged.
I scrubbed mine down and used Duplicolor engine primer and followed with Duplicolor engine enamel. One of my many favorites mods😂😂
3996D61E-402C-4918-B580-B1FB2758B9CD.jpeg
 
REALLY cold here in northern IL, so I've been working on little stuff in my basement instead of the unheated garage. Got my airbox patched up tonight. It did not have the common split along the bottom, but the flange that the filter cover bolts onto was separated, the cover was warped, and the foam seal was disintegrated. I got the airbox flange put back together with some hot-melt staples and epoxy and re-shaped the cover with a heat gun. I just need to get some foam weatherstripping for the cover now and I should be good.

Oh, I also got a plug sealed into the suction air grommet as part of my suction air delete. It's just a plastic furniture plug from the hardware store that fit the inside of the grommet well, sealed with RTV. I did the same thing on my 600 and that worked well. I looked at getting a solid grommet the correct size, but it was hard to find at quantities less than 10 or 20. That would be my ideal solution, but this works fine and is hidden anyway.

1000004241.jpg

1000004242.jpg

1000004244.jpg

1000004243.jpg
 
Ive got a question about the airbox on these bikes; is there a reason we don't rejet and use pod filters?

-Z
 
Ive got a question about the airbox on these bikes; is there a reason we don't rejet and use pod filters?

-Z
A great time to ask!

 
The 2 minute Jett Kit is a dyno proven modification that costs little.
It causes smother power and more torque.

The reason I mention it is; it uses smaller main jett's and it intentionally restricts the air flow.
(done with a piece of foam rubber placed in the intake of the airbox)
(Yea, I know it's counter to all that we've always thought. But it works!)

Going to pods would do the opposite. (unrestricted air flow)
(With jett changes, the Pods may give you a bit more peak power but the low end will suffer).

Ride safe, Ted

 
Last edited:
Here's another little fix I did last night. The locating nub was broken off the left bar switchgear housing. It keeps it from rotating, and I see these broken pretty often on Kawasakis that use this housing, as a sticky enricher cable or plungers cause the enricher lever to twist it with more force and shear it off. Since the little broken but was still stuck into he handlebar, I was able to super-glue it back together, with a snug-fitting finish nail in the middle for reinforcement, which j then trimmed off flush with a Dremel tool. If the broken nub is missing you can do the same thing, but will need to make a new piece out of some spare plastic, or epoxy putty.

1000004245.jpg


1000004246.jpg
 
I rebuilt my petcock last night. It wasn't obviously leaking or otherwise malfunctioning, but since the bike had been sitting for a while before I got it, and had some pretty nasty gas, I figured it would be good preventative maintenance. The parts inside seemed to be mostly OK, but the diaphragm was a bit crusty, and the diaphragm O-ring seemed a little hard.

I used an All Balls kits, rather than K&L, partly to see how it holds up in comparison. It looked good enough quality, and only difference I could tell from stock or K&L, is that the valve seal O-ring provided is actually an X-ring. Not sure if that's better or worse.

I ran the parts through my ultrasonic, and as usual, was amazed at how shiny it came out. I also polished the diaphragm shut-off seat, sanded the back of the valve and polished it, and polished up the valve area inside the body.

I did some testing with vacuum pump and confirmed it working fine, although once the diaphragm did not fully seat and seal. Not sure if that was a fluke from it being dry, or something to watch. I just installed overflow tubes in my carbs too, so I have peace of mind there.

1000004249.jpg

1000004250.jpg
1000004251.jpg

1000004252.jpg
1000004254.jpg
 
The PO of my bike gave me a spare gas tank. Would it be worth it to pull the petcock off of that one and rebuild it? Or should I spring the $100 for a new one from Kawasaki?

-Z
 
Started performing 205K maintenance on my '95...... to include wheel bearing replacement, swing arm pivot bearings check, clean and lube, drive shaft, wheel hub spline and suspension bearings lube, full coolant system check, all fluids change, steering bearing check and lube, air filter clean and lube, and anything else that gets in my way during the process. Even tho' I know the valves are good, I still may pull the cover just for grins. And while the bike is semi-nekked, I may take another stab at getting the Audiovox cruise to work. It "died" after I installed the stick coils. I have a number if ferrite beads that I can place on various leads to try and quench any interference that's being picked up in the wiring. It's a last-ditch effort to get it working without swapping out the system's servo.

I have a couple of longer trips planned this year and I want to try and minimize the chance for any surprises.

Pulled the rear wheel yesterday and changed out the bearings and seal. Also cleaned, inspected, and lubed the hub splines. After using Honda's Moly Paste for a number of years, I was pleased to see that the Locktite Moly Paste I used the last time is doing its job; wear abrasion to the splines appears to be abated. Today, the rear bevel case and swing arm come off, and hopefully back on barring any surprises.

IMG_1957-L.jpg


IMG_1958-L.jpg


IMG_1961-L.jpg


IMG_1963-L.jpg


IMG_1964-L.jpg


IMG_1965-L.jpg
 
Last edited:
@gbyoung2 Thanks for sharing your preventive maintenance journey.

I especially like part of your message, if I may put into my own words, “better to work on the machine in a controlled space than wait for a breakdown on the side form the road.”

Wayne
 
Wow, very nice!
If you’re referring to the rear tire lift scheme – had to. The rear wheel was just getting too heavy for this aging body, especially since I can’t get close enough to the bike due to the side extensions I have on the lift. In addition, with the Soucy lowering rocker, Wing-sized tires, and a shortened centerstand, I couldn’t get enough “altitude” to get it out from under the fender. Still might be an issue when out on the road, but if we must go to those means we’ll just have to call in the calvary.

An option might be to whack off a section of the rear fender like some have done, but I prefer not to do that. We'll keep the bike as stock looking as possible and deal with the consequences should they arise.
 
I'm in the same boat. Looking for an easier way to lift the back of the bike.
I hadn't thought of also being able to lift the wheel. But, I like that!!

Can you post a photo of just the hydraulic table? I don't recall ever seeing something like that.

Ride safe, Ted
 
I presume like this @connie_rider, this one has a 27” lift, another model from same distributor has 35” lifting ability…

View attachment 38303

Wayne

The one I have is a similar Roughneck that I got from Northern Tool several years ago (probably the same manuf.). IIRC, either local HF didn't have any at the time, or I preferred one with an offset handle. Regardless, it's worked out well for my needs. 99% of the time it's used to hold heavy machine attachments (i.e., vises, rotary table, etc.) for my mill when they're not sitting on low slung dollies I'd made for them.
 
Picking up where I left off yesterday with maintenance items on my '95.............

Well, things didn’t go quite according to plan today. Got started later than I wanted ‘cause I had to run some errands for my wife. Then it got a little interesting once I did get into it.

Started by draining the rear hub before pulling it off the swingarm. The (4) nuts that hold it in place had tightened to the point I almost had to use a breaker bar to get them loose. Once off, it was apparent that oil was getting past the pinion seal since the o-ring was still intact. Gonna need to do a little surgery on the rear end to take care of that. Fortunately, I do have the seal and the large o-ring. Been through this exercise before on my ’86. Not fun, but doable. I’m not replacing the bearings, so the original shims will be going back in once the seal is changed. I cleaned up the rear hub in prep to tear it apart later, and moved on.

Next was to pull the swingarm. Been through this before awhile back, and it’s usually a pretty easy task. It was becoming evident that today was not a “usual one”. The (6) Allen head cap screws came out easy enough, but things came to a halt when trying to pull the RH pivot shaft. Even tho’ I had treated it with a coating of anti-seize the last time I had it out, that sucker wouldn’t budge. After treating the joints with Kroil, I was finally able to get it out with the help of a slide hammer and a steel heel pry bar.

That was it for the day. I cleaned up me and my mess, hit the light switches and headed in for dinner. I’ll get back at it Monday since the w/e is reserved for Easter activities.
 
I rode over to my friend's place an hour away yesterday and we swapped on a new set of tires. The ones that came on my bike had plenty of tread and no cracks, but sure did feel hard. I put a set of Avon Spirit STs on (with 110/80 front size). He has a decent manual tire changer and plenty of experience doing multiple bikes of his own and other friends, so it sure beat doing it the caveman way myself.

Honestly, the handling was a bit funky on the ride home, with a kind of twitchy unstable feel above 50mph, but when I got home my pressures were a bit low (about 33.5 front and 39.5 rear). I'd aimed for the 36/42 from the manual, but I guess my friend's gauge was a bit off. The previous tires were the OEM Dunlops, which handled really well, but I never pushed them much in the 80 miles or so I rode on them, since the were 2005 date codes and hard, as mentioned above.

I guess I need to try them some more at proper pressure. I did some searching on old threads, and it seems like the consensus was that Avon radials like higher pressure, so I topped them up to 40 front and 42 rear and will try that (once it stops raining here, which looks like all week). I would have thought that higher pressure would make them twitchier, since the front especially would be riding on a narrower contact patch, but maybe not. My 600 with a 120/80-16 always felt so stable, almost slow on turn-in, so the quick and twitchy feeling on this much bigger, heavier bike is odd.

Anyway, here's how I got over to my friend's place with my new tires! It was a beautiful ride over, but then rained the entire ride back.
PXL_20240331_183251846.jpg
 
Picking up from where I left off last Friday with maintenance items on my '95.............

Monday - The final step to getting the swingarm out was to drop the shock. That done, the swingarm could easily be removed. Now out, pulled the pivot bearing oil seals (more like grease shields) from the pivot joints in the swingarm so the tapered rollers could be removed. Once removed, they were cleaned, inspected, and re-greased. After thoroughly degreasing the swingarm in my parts cleaner, the bearings were re-packed with grease, put back in place, and the seals popped back in.

I tried cleaning the troublesome RH pivot pin with fine crocus cloth, but that wasn’t too successful. Decided to “skin” the surface of the pin with my lathe, and it came out perfect (can be seen on the lift, sitting verticle in the far right of the top pix). It now goes in and out of the pocket in the frame with no binding what-so-ever. After removing, inspecting, lubing, and reinstalling the driveshaft coupling, I put the swingarm back in place. After reinstalling the shock, all rear suspension needle bearing joints/fittings were lubed.

There were a couple of interruptions in my workflow: one, when I ran out of grease in my small cartridge-type grease gun. The empty cartridge refused to come out so it could be replaced. That took about an hour. Once done, I had grease on everything that didn’t need grease – including me. The other was that the drain “filter” in my parts cleaner decided to clog up. This became evident when I was washing down the swingarm and the tub wasn’t draining properly and filling up with solvent. Over time it did eventually drain back into its drum, but it needed to be taken care of.

The drain filter is nothing more than a simple sock that collects debris and keeps it clear of the solution in the drum. The problem is that the entire tub / pump assembly must be lifted up off the drum to gain access to the sock so it can be replaced. The only way I can do this by myself is to use my overhead chain fall. That’ll happen tomorrow once I shuffle stuff around so I can roll the parts cleaner out for easy access. That’ll also give me time to rummage through my sock drawer to find the most hideous looking (used) sock that I wouldn’t appear wearing in public again to be repurposed as a filter; It’s mate will serve as a spare.

A new day (Tuesday) and the parts cleaner filter was taken care of. After verifying (again) that the pinion gear O-ring was intact and not simply cut or nicked, it was time to cross the Rubicon and take the rear hub apart to replace the pinion gear seal. After cutting a tool to clear the factory clinch on the pinion gear nut, I was finally able to break it free so I could gain access to the seal. Making sure to keep track of the installed shims, the pinion gear was removed from its holder and the individual parts were thoroughly cleaned once the old seal was removed.

With the new seal installed, the rear hub was reassembled. Once torqued, the pinion gear nut was re-staked and a new O-ring installed. Since no bearings had been replaced and the original shims were used, I wasn’t concerned with proper tooth contact, but did do a check on the amount of backlash present. It felt the same as it did before disassembly, so we called it good. Everything was lubed up and the rear hub was mounted back to the swingarm. Once the bike was scooted back a little to the rear on the lift so its pocket was better aligned with the hydraulic lift table, the rear wheel was remounted.

This was the major item I wanted to get done, so we can move along at a more relaxed pace to finish the other stuff. Still have a number of weeks to go before I head off to the Spring Fling.

IMG_1975-L.jpg


IMG_1978-L.jpg


IMG_1986-L.jpg


IMG_2009-L.jpg


IMG_2010-L.jpg


IMG_2011-L.jpg


IMG_2012-L.jpg


IMG_2017-L.jpg


Put the mufflers on late in the day. Will probably leave the trailer hitch off until I get back from Wellsboro.
IMG_2019-L.jpg
 
Last edited:
Just installed the KB fork brace I got from Bowtie39. Heading out for an eclipse test spin shortly. :cool:

View attachment 38424
Nice! That's the same setup that came on my bike. Looks like you also have a 2002 (same as mine).

Did you make the driving light brackets, or buy them somewhere? Do they mount on teh calipers, or fender bolts?

I made some similar to yours that mount on the fender bolts on my 600 to support me Skene photon blaster LEDs. I made three different prototypes before I was happy, but they came out nice. My C10 came with a Ronnie Lyons light bar, so I am already set up on it.
 
If it is a KB brace, Murph's sells the fork guards. They attach with little allen screws to the pre-drilled holes in the top of the brace.
I noticed when I parked that there were small holes on top. Guess they must be KB. Could find any marking on it when I bought it off eBay.
 
brotheriam6109752’s post about the broken cam chain reminded me of a maintenance item I’d been considering for a couple of years. With over 205K on the bike, that item has been making me a little nervous for a while now. While I’m on the maintenance path right now for the upcoming season, I went ahead and put a chain on order. I’m basically done with all the other stuff and can jump on it as soon as it comes in.
 
And on that "^" note, got an email today that my parts (which includes the new cam chain) have shipped. That’ll give enough time to try the ferrite beads I have on various leads that are connected to the Audiovox servo and control pad. Mine cruise stopped working when I changed from the OEM ignition coils to the coil-over-plug arrangement several years ago.

I’ll keep changing the beads around and if I find a particular placement layout that causes a “juke” in the servo actuation cable when I hit “Set” on the pad, I’ll bite the bullet and lose a little religion while reconnecting the actuator “noose” around the carb throttle connection. That movement is an indication that there may be hope in getting it working again.

Fingers crossed ......................
 
I decided to strip my C10 today and now she’s naked. I removed the rear trunk, brackets and hardware. Replaced with the stock rack and cowling. Removed both side bags and mounting brackets. Replaced with stock side covers. Removed the two inch handlebar risers and mounted the bars in the stock position. Lastly I removed the highway pegs which I’ll never use. I’ll probably list them in the classified section soon. Maybe the trunk also. I’m a minimalist by nature so I’ll probably never even miss either. Obviously I’ll be keeping the side bags for long trips. I think the bike looks cleaner and less cumbersome. I’ll see how the weight loss affects the handling and also whether removing those bar risers ****s up my comfort. I’ll find out tomorrow when I go riding.
 
Today I did a balancer adjustment, twenty-ish years since the last one, which noticeably reduced vibration in the grips. In 2010 I purchased a '08 Goldwing relegating my C10 to commuter and around-town use. A few weeks ago I was running an errand on the C10 and was enjoying myself so much that my 45 minute errand turned into 3.5 hours. During that ride I ended up on a 70 mph interstate. The buzz in the grips was almost unbearable. Following the balancer adjustment I took it on that interstate again. It now seems to have less buzz at 70 mph but more at 55 mph (the difference between 3500 and 4500 rpm). Curiously, my last adjustment was minor, from the 3:00 position to about the 3:30 position but this time it is around the 4:30 position. I am curious whether this is considered normal due to wear. The odometer just turned 60,000. My adjustment procedure was: engine just warm enough to idle at 1000 rpm, ccw till I heard noise, clockwise till noise went away then just a touch more.
 
Today I did a balancer adjustment, twenty-ish years since the last one, which noticeably reduced vibration in the grips. In 2010 I purchased a '08 Goldwing relegating my C10 to commuter and around-town use. A few weeks ago I was running an errand on the C10 and was enjoying myself so much that my 45 minute errand turned into 3.5 hours. During that ride I ended up on a 70 mph interstate. The buzz in the grips was almost unbearable. Following the balancer adjustment I took it on that interstate again. It now seems to have less buzz at 70 mph but more at 55 mph (the difference between 3500 and 4500 rpm). Curiously, my last adjustment was minor, from the 3:00 position to about the 3:30 position but this time it is around the 4:30 position. I am curious whether this is considered normal due to wear. The odometer just turned 60,000. My adjustment procedure was: engine just warm enough to idle at 1000 rpm, ccw till I heard noise, clockwise till noise went away then just a touch more.
I've wondered about doing the adjustment on mine too. It's only 12k miles, but has been sitting a lot before I got it. It does have more vibration than I had anticipated, especially compared to my 600 with no balancer, but I've never ridden another one of these or the other models with this engine family, so I don't know what's normal.
 
Time for another Al Michaels, “Do you believe in miracles?” quote? Perhaps.

Stripped the bike down a little further to where I could access the electrical, vacuum, and fuel connections so I could troubleshoot the non-functioning Audiovox cruise. I had pretty much left everything intact except the tach lead connection to one of the COP leads, and the vacuum line to one of the intake nipples. The servo actuator had also been disconnected from the carb bank, but I wasn’t going to fight that battle until I saw some life during testing.

After making the other connections I rigged up a temp fuel connection and started the bike. Once warmed up slightly, I turned on the cruise and poked the SET button. Whoa!! The cable retracted trying to actuate the carbs. Keeping the idle speed up so the cruise could respond (there’s a minimum RPM setting that it will), I fooled with the control pad turning it on and off and the servo responded in kind with cable movement.

IMG_2047-L.jpg

I've got an IV stand that I normally use to hoist my auxiliary fuel supply, but it was buried so the bungees worked just fine.

Was looking for life with movement of this cable:
IMG_2048-L.jpg


I made no changes in any of the connections, so I can only assume that when the tank is in place, it’s containing, reflecting stray EMI back into the wiring, and messing with the servo’s electronics. A WAA, obviously. I’ll put the tank in place tomorrow and repeat my tests to see what happens.
 
Last edited:
I've wondered about doing the adjustment on mine too. It's only 12k miles, but has been sitting a lot before I got it. It does have more vibration than I had anticipated, especially compared to my 600 with no balancer, but I've never ridden another one of these or the other models with this engine family, so I don't know what's normal.

A word of caution: once the pinch bolt has been loosened so the adjust can be turned - DO NOT START THE BIKE UNLESS YOU HAVE THE BLADE OF A SCREWDRIVER FIRMLY ENGAGED WITH THE ADJUSTER SLOT AND HELD FIRM!!

Once the bike starts the adjuster will quickly rotate and the mechanism can lock in a jammed state. Some will free up easily, and others not so much.

You've been warned.
 
A word of caution: once the pinch bolt has been loosened so the adjust can be turned - DO NOT START THE BIKE UNLESS YOU HAVE THE BLADE OF A SCREWDRIVER FIRMLY ENGAGED WITH THE ADJUSTER SLOT AND HELD FIRM!!

Once the bike starts the adjuster will quickly rotate and the mechanism can lock in a jammed state. Some will free up easily, and others not so much.
I'm well beyond that point. Adjustment is complete. I'm just curious about...
... how wear/mileage affects the effects of adjustment.
... whether too much cw adjustment can increase vibration at lower rpm while decreasing at higher rpm.
 
I'm well beyond that point. Adjustment is complete. I'm just curious about...
... how wear/mileage affects the effects of adjustment.
... whether too much cw adjustment can increase vibration at lower rpm while decreasing at higher rpm.

I can't answer those questions. Neither of my bikes ('86 or '95) never really had vibration. I did tweak them both just for grins.... just adjusting them to the noise mentioned in the Manual went away. Never touched them again.
 
Maint., cont'd:

Well, stuck the (empty) tank in place to see how the cruise would react. It still responded but seemed a little more “spastic” than it did with the tank off. Stuck a couple of ferrite beads on various leads and it seemed to settle down a little, but it’s a hard call. Trying to assess proper operation in its present state (basically an open loop response with no feedback from a disconnected throttle) would probably give strange results.

We’re gonna roll the dice and put the “noose” on the carb bank throttle cable connection. If you’ve ever fought this battle, everything can fall into place first shot, or it can be a real PITA if it doesn’t.
 
Today I:

  • Changed oil
  • Changed spark plugs
  • Removed my broken centerstand and installed the spare
  • Inspected my final drive oil level
It's dark, so I'll do my brake pads tomorrow.

Question: cylinder 2 (middle clutch side) spark plug had oil all up on the threads. Others were dry; what does that indicate?

Bike runs a lot smoother with new plugs.

-Z
Others may have more experience, but my guess would be a leaky cam cover seal around that spark plug. Each spark plug hole in the cam cover has it's own round molded rubber seal, in addition to the outer cam cover gasket.

My last car had a similar cam cover (24V VR6 VW GTI). When I got it, the spark plugs and coil-on-plug packs were all swimming in oil, and when I tore it apart to replace the gaskets, some of those spark plug hole gaskets were actually split with a gap in them! I don't know of C10s commonly get that bad, but it's definitely a place they can leak.

When were your valves adjusted last? If the oil leakage isn't too bad, you may just wait until the next adjustment when you'll replace all those gaskets anyway. Just be aware that the oil can soften and degrade the rubber spark plug cap boots.
 
Was there oil on the face of the plug
Today I:

  • Changed oil
  • Changed spark plugs
  • Removed my broken centerstand and installed the spare
  • Inspected my final drive oil level
It's dark, so I'll do my brake pads tomorrow.

Question: cylinder 2 (middle clutch side) spark plug had oil all up on the threads. Others were dry; what does that indicate?

Bike runs a lot smoother with new plugs.

-Z
If there is no oil or heavy deposits on the face / electrode of the spark plug the origin is likely external from the combustion chamber. Agree with @SethInIllinois and furthest below part that is likely leaking is circled.

Leak could be from:
  • Age: e.g. previous owner reused gaskets at valve job or never did a valve job
  • Gasket was dislodged at time of assembly and never repositioned properly
  • Gasket was damaged in assembly
  • Mating surfaces were not clean or marred and gasket cannot adequately seal.
  • Improper torque - You could try loosening and torquing the head cover bolts to specification. Could be head cover was not torqued properly and therefore gasket weeping.
Wayne
556F75CC-BDF3-4DE8-8DFA-87E4A3A5FCCE.jpeg
 
Thank you all for the responses. It probably is that gasket. But I'll take care of that when I do my valves.

Bike is running significantly better with the new plugs. I also am going to buy a carb sync (left my set in CA....🤬) and check the carbs.

Next thing I need to do is figure out that leak that's around my bevel gear. There's oil all on the joining area with the bolts. Anyone have experience with that? How much of a pain is it to fix?

-Z
I believe the older models used a paper gasket that has a tendency to fail, but the newer ones used a more reliable steel gasket. I don't recall when they switched, but I'm sure others here do.

Make sure you narrow down the actual source of the leak, though. Excess crankcase breather oil can drip out of the vent tube or airbox and end up down on the bevel box and looks like it's coming from there. I was sure my 600 had a leaking shifter seal, but it turned out to be from the airbox and just leaking down onto the case and that was the lowest part that it dripped off. My Concours also had a leak closer to the front which I assumed was the clutch pushrod, but it turned out to be a cracked oil galley plug.

Moral of the story, is that the source of oil leaks can often be different from where they look.
 
You need to figure out if it is motor oil or rear drive gear oil that is leaking. I had the same type of leak when I bought my bike back in 2014 - oil was on the bevel, the rubber boot and on the swingarm/driveshaft. Found this thread https://forum.concours.org/index.php?threads/gear-oil-in-shaft-housing.20484/ and, based on SISFs recommendation, I replaced the 92055c (92055-1646) o-rings and the leak has been gone ever since. The #1 o-ring came out in pieces. Read SISFs posts #6, #9 and #13 in the attached thread. Makes sense.

1713276648746.png
 
I believe the older models used a paper gasket that has a tendency to fail, but the newer ones used a more reliable steel gasket. I don't recall when they switched, but I'm sure others here do.

Make sure you narrow down the actual source of the leak, though. Excess crankcase breather oil can drip out of the vent tube or airbox and end up down on the bevel box and looks like it's coming from there. I was sure my 600 had a leaking shifter seal, but it turned out to be from the airbox and just leaking down onto the case and that was the lowest part that it dripped off. My Concours also had a leak closer to the front which I assumed was the clutch pushrod, but it turned out to be a cracked oil galley plug.

Moral of the story, is that the source of oil leaks can often be different from where they look.

I do have a nasty oil leak from somewhere down below. Don't know exactly where. I think it may be the oil pan gasket.

This is the problem with having a bike that has to be running all the time; hard to take it off the road for a few days to get into things....

Ugh. I need to spend a weekend with someone with a shop so we can pull a couple of 12 hour days.....

Anyone nearby? I'll bring beer....

😁😎

-Z
 
You need to figure out if it is motor oil or rear drive gear oil that is leaking. I had the same type of leak when I bought my bike back in 2014 - oil was on the bevel, the rubber boot and on the swingarm/driveshaft. Found this thread https://forum.concours.org/index.php?threads/gear-oil-in-shaft-housing.20484/ and, based on SISFs recommendation, I replaced the 92055c (92055-1646) o-rings and the leak has been gone ever since. The #1 o-ring came out in pieces. Read SISFs posts #6, #9 and #13 in the attached thread. Makes sense.

View attachment 38536

This is fantastic! I checked my final drive oil level, and it was at the appropriate level, so I'm guessing this is engine oil.

Still. I need to spend a weekend with someone with a shop or at least a covered area and work on all this stuff. One of the (many) downsides to living in a city.....

-Z
 
Maint., contd:

Well, it was fun, but it was all for naught, sorta. Pulled the valve cover and top chain guide off so I could measure the chain "stretch" wear. Took the reading a slew of times after rotating the crank, and the reading were all pretty consistent... right at the high end of the normal spec. Needless to say, I'm not going to replace the good with another good. The guide also looked good and there was still clearance for the rivets in their pockets.

IMG_2050-XL.jpg


I tried to take a shot with the guide off and the caliper in place taking a reading, but couldn't get my oily, gloved fumble fingers to cooperate in multitasking, so had to settle for the below. Also forgot to just take a shot with the guide off.

IMG_2060-L.jpg


Did check the valves while I was in there, and they were all where I had set them a couple of years ago (always set them at the high end). This also give me the opportunity to install the Euro valve cover I got a couple of years ago and refurbished.

before-L.jpg


IMG_1207a-L.jpg
 
Last edited:
That's good peace of mind!

I also installed a Euro-spec valvecover when I did my valves this winter. It's so much easier to get in and out without the PAIR valve bosses sticking up.
 
I pulled the front end this evening in preparation of upgrading my forks to Racetech cartridge emulators and 0.90kg/mm springs. I also discovered some Brinnelling (or false Brinnelling, not sure which) on the upper steering head bearing. The grooves are deep enough to feel with a fingernail. The lower bearing has very faint marks, but not enough to feel. In any case, I've got a new set on order from Murphs.

1000005338.jpg
1000005333.jpg
 
My new bearings won't be here until later this week, but I managed to get my old races out and pull the lower bearing. On the last set I did, I welded some lumps on the races to use a drift and drive them out, but this time I tried a tool. I got a cheap China special copy of the OTC version, and I did have to grind it a bit to get a sharp edge and better fit after it slipped off on the first try. It did work then, and was a bit less hassle (and no burned paint) than the weld method.

I also had to improvise my bearing puller, as the steering stops prevented it from fitting properly. I'd already ground the clamp a bit to fit my 600 for the same reason, but the stops are even fatter on the C10, so the bolt spacing wouldn't fit. Probably because the C10 lower triple is aluminum vs cast steel on the ZX600-C.

1000005343.jpg
1000005344.jpg
1000005347.jpg
 
Anxious to hear if the new bearings solve the problem you've been having.
Also waiting to read a report on the Emulators and Springs.

Ride safe, Ted
Yeah, I'm optimistic as well, although I'm not getting my hopes up too much. I've been doing more digging and it seems like "feels like the rear tire is on marbles" is not an uncommon experience with the Avon Spirit ST. I guess the question is whether that's inherent behavior of this tire, or if it just amplifies other issues (steering head bearings, suspension, etc). Some reading I've done suggests that bias ply tires provide more damping, so they are more forgiving of stability issues.

After I got the bearings and races out, I cleaned them in kerosene and tried them by hand. The lower felt just fine (and the witness marks from the rollers are barely perceptible). The upper did feel a little notchy, but it was not terrible. It's interesting that the top one had more damage than the bottom. When I did the ones on my 600 (identical steering head), the bottom race had some marks, but the top was pristine. I suppose this would be due to the Connie being over-tightened. See photo of the races from my 600 below. I'm not sure how many miles were on them, as some work had been done on them at some point in the 37k miles the bike had at that point, as they were lubed with red high-temp wheelbearing grease, and the bottom seal was installed upside-down.

PXL_20240128_225952696.MP.jpg

My plan is to get it together with the new bearings and rebuilt forks and see how it feels then. I'm planning on a steering damper too, even if it doesn't solve this problem, just as more peace of mind and insurance against death wobble from any cause. If all that fails, I guess I'll try different tires, or at least a different rear.
 
Yeah, I'm optimistic as well, although I'm not getting my hopes up too much. I've been doing more digging and it seems like "feels like the rear tire is on marbles" is not an uncommon experience with the Avon Spirit ST. I guess the question is whether that's inherent behavior of this tire, or if it just amplifies other issues (steering head bearings, suspension, etc). Some reading I've done suggests that bias ply tires provide more damping, so they are more forgiving of stability issues.

After I got the bearings and races out, I cleaned them in kerosene and tried them by hand. The lower felt just fine (and the witness marks from the rollers are barely perceptible). The upper did feel a little notchy, but it was not terrible. It's interesting that the top one had more damage than the bottom. When I did the ones on my 600 (identical steering head), the bottom race had some marks, but the top was pristine. I suppose this would be due to the Connie being over-tightened. See photo of the races from my 600 below. I'm not sure how many miles were on them, as some work had been done on them at some point in the 37k miles the bike had at that point, as they were lubed with red high-temp wheelbearing grease, and the bottom seal was installed upside-down.

View attachment 38548

My plan is to get it together with the new bearings and rebuilt forks and see how it feels then. I'm planning on a steering damper too, even if it doesn't solve this problem, just as more peace of mind and insurance against death wobble from any cause. If all that fails, I guess I'll try different tires, or at least a different rear.
The steering damper will be interesting. I don't think I have seen one in a C10.
 
I installed a Steering Damper on my first C-10.
It was a basic unit like this. Took a lot of tinkering and fitting to make it fit/function like I thought it should, but I managed to make it work.
Disclaimer;
I have no idea if it actually did anything for me, (I just wanted to see if I could do it),,,, but I don't recall that bike having the decell wobble.
 
Last edited:
I installed a Steering Damper on my first C-10.
It was a basic unit like this. Took a lot of tinkering and fitting to make it fit/function like o thought it should, but I did it.
Disclaimer;
I have no idea if it actually did anything for me, but I don't recall that bike having the decell wobble.
Did you mount yours on top of the triple clamp, or elsewhere? I thought about that, because the hardware wouldn't be too bad (clamp with a post off the top frame tube behind the steering head, and then a bracket off one clipon), but I don't like the cluttered look of them there.

I have this one in the mail. It looks like a cheap Chinese knockoff of an Ohlins (although I'm not even sure Ohlins makes one with a stroke this long). I do not have high expectations for it, but hope it works good enough/long enough for successful prototyping and testing.

I plan to mount it below the tank on the left side, between a clamp on the left fork leg and bracket off the fairing mount, like this guy did: https://web.ncf.ca/ag136/steeringDamper.htm

I'm also considering a rotary damper like a Scotts, which has the advantage of being more adjustable and relatively tidy on top of the triple clamp. No one makes brackets for these bikes, but I could make one similar to what Scotts does for the Ninja 250/300. https://www.scottsonline.com/Stabilizer_Purchase2.php?Bike_ID=1215&BI_ID=108855
 
My apologies. Been too long ago. Don't recall the exact details.
I mounted it similar to how he did it.
https://web.ncf.ca/ag136/steeringDamper.htm
Recall that I also had to manufacture a clamp to go on the fork tube.
But (I think) I mounted the Damper connection point behind the fork tube (closer to the centerline of the bike) because it reduced the amount of travel required.

Ride safe, Ted
Good to know. The damper I got is supposed to have a 130mm stroke, and I ordered a 41mm clamp to use on the fork tube. I'm hoping I can find a good orientation to get full lock-to-lock travel, but if I have to add some shims on my travel stops like that other guy, I'm prepared to do that.
 
Got my forks rebuilt with Racetech cartridge emulators and 0.90kg/mm springs today. I spent the most time making some custom steel bushings for the ends of the PVC spacer, since I didn't like how the flat washers Racetech included didn't keep the spacer centered in the fork tube.

Everything was pristine, so I re-use the slider bushings, but I did use new K&L seals from Murphs for good measure. Also used Maxima 15W oil from Murph as well.

Everything is set up and adjusted per Racetech. I cut the spacers for the recommend 25mm preload with the adjusters at 2 lines down, so I have a little room to back them off, and quite a bit of room to tighten them down if I need to.

1000005401.jpg

1000005402.jpg

1000005404.jpg
1000005409.jpg
 

Attachments

  • 1000005407.jpg
    1000005407.jpg
    149.6 KB · Views: 4
What setting did you use on the Emulators, what color springs, and how many holes are in the top plate?
I used the yellow springs at 2 turns preload and 4 bleed holes, which is how many they came with when I bought them a few months ago.

The other setup details were 150mm oil level with 15W and 25mm preload on the 0.90kg/mm springs. I weigh about 170lbs.

Hopefully I'll get it all out back together in the next few days and can report back on the results.
 
Top