• Can't post after logging to the forum for the first time... Try Again - If you can't post in the forum, sign out of both the membership site and the forum and log in again. Make sure your COG membership is active and your browser allow cookies. If you still can't post, contact the COG IT guy at IT@Concours.org.
  • IF YOU GET 404 ERROR: This may be due to using a link in a post from prior to the web migration. Content was brought over from the old forum as is, but the links may be in error. If the link contains "cog-online.org" it is an old link and will not work.

Re: What did You Do to your C-10 Today?

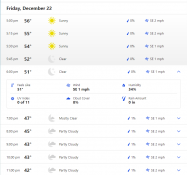
Always happens when you really want to try something out.

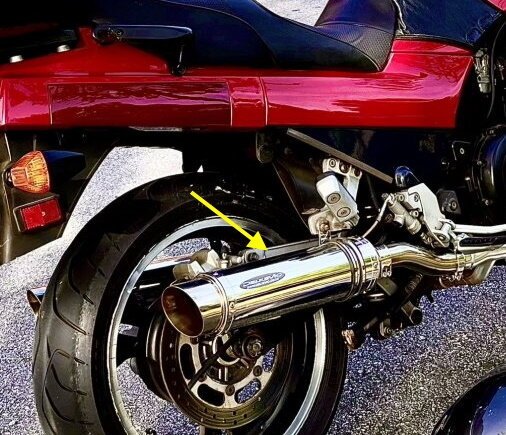
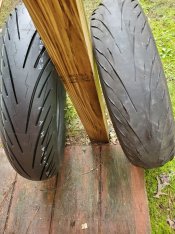
I'm just trying to keep my bike as nice as possible..... I DO wanna go on a rain ride, and I may take the Vulcan out....

Days like this make me miss living in Santa Barbara..... the roads.....

This was on my last visit out there. My buddy was a pro racer, and I'm on his blueprinted '86 GSXR750, following him on his 95 Ducati 900SS.... I used to ride up here weekly.... ugh....

 
IMO.....worth the effort to fix it. Those racks haven't been made for years.

It really is a good rack. I like it a lot. I'll take some pics a bit later. I'm also thinking of following @connie_rider 's advice and adding some supports that will bolt into the luggage rack area from underneath so I can carry a heavier load on it. But the height is PERFECT! Plus, I think it makes the bike look sleeker than with a top case (even if I've lost storage space....)

😁

-x01660
 
Checked my maintenance records, which I’m anal about, just ask SWMBO.😝😝
Saw that I had never replaced the throttle cables. Bought the ‘00 C-10 in 2007 w/ 32k on it. Just turned 73k and noticed slight binding. Bought new OEM cables and started to replace. Granted only time I ever messed with the cables was removing them when I pull the carbs. Doing to push cable was no biggy. Fought and fought with pull cable and could not get the *#% new cable back on. Had to pull the carbs. Seemed to be the easiest and it worked. With the mosquitoes coming out still, it was time to stop. Still have to finish attaching to the throttle and put full fairing back on for cooler weather. Of all the years I’ve wrenched on her, the cables have to be the damndest if I don’t pull the carbs.
Have plenty of tools: needle nose, forceps etc.
 
Doug. We all been their. Doing something that seemed so simple but somehow it turned into something so hard we just could not get it right. You will get it tomorrow for sure. Just make sure you spray some OFF on anything them mosquitoes can get to. DEEP WOODS OFF works the best.

Dean
 
Checked my maintenance records, which I’m anal about, just ask SWMBO.😝😝
Saw that I had never replaced the throttle cables. Bought the ‘00 C-10 in 2007 w/ 32k on it. Just turned 73k and noticed slight binding. Bought new OEM cables and started to replace. Granted only time I ever messed with the cables was removing them when I pull the carbs. Doing to push cable was no biggy. Fought and fought with pull cable and could not get the *#% new cable back on. Had to pull the carbs. Seemed to be the easiest and it worked. With the mosquitoes coming out still, it was time to stop. Still have to finish attaching to the throttle and put full fairing back on for cooler weather. Of all the years I’ve wrenched on her, the cables have to be the damndest if I don’t pull the carbs.
Have plenty of tools: needle nose, forceps etc.
I watched my son get them back on with the carbs installed. It's been 6 years ago so I can't remember if I helped him or not. It's a pita, but it can be done.
 
I watched my son get them back on with the carbs installed. It's been 6 years ago so I can't remember if I helped him or not. It's a pita, but it can be done.
I saw your post from then where he fashioned a tool from chopsticks and something else.
Going to have to stop by Harbor Freight to look at their long needle nose pliers. The biggest pain was keeping to barrel in to get the cable to go into the slot.
 
Tricks I've learned.

1) If you use a flashlight, place it in a stationary position. Don't let someone (particularly your wife) hold it for you.
Result of them shining the light where they can see (instead of where you can see) is normally a fight.

2) Instead of a beam, use one of the lantern/flashlights that lights up the area and set it in a good position.

3) Disconnect the cables at the handlebar. (to get more slack)

4) Bend the end of the cable into a curve. (so you can come in from the side)

5) Buy and use long Forceps. (12" or longer)
Their available at Harbor Freight in straight and angled.


6) When you get to the cable (that is deep into the darkness) wedge the butterfly's fully open to bring that connection to the top. (Allows easier access, and it helps get the cable into position a lot)

But the most important is;
7) When you're frustrated, shaking, and mad, take a break.
(mebbe drink a cold one)
And then come back and give it another shot.
{Repeat as needed}

8) If that fails, ask your wife to do it.
She'll do it easily and embarrass you. o_O

Good news: Now that the cables are hooked up at the carbs, you get to do it at the handlebar.
(You may discover that you hooked up the cables in reverse).
Fun, fun, FUN!!

Ride safe, Ted
 
Last edited:
Ted's reply is spot on, especially the part about not letting your wife hold the flashlight. Truer words never spoken.
The keys for me were these items:
1. Bend the end of the cable into a curve.
2. Get at LEAST a 12 in pair of locking pliers or hemostat.
3. Wedge the butterflies open.
4. Take a break when frustrated.
It took me the better part of a weekend to complete the work. At one point it had gotten frustrating enough where I was considering an "as is, where is" sale.
It's been awhile since I did the cable replacements, and I recall it as one of the most irritating mechanical jobs I had ever done.
I did #1 and #3. Have to get #2 and learn #4😂😂😂
 
Brilliant!
I’m gonna make me one of those.
I’ve got a couple old KZs to keep running and both sets of carbs need a bit of work 👍
 
this bar comes from which machine

1696867985-7cb9a693-8801-4d32-bf1a-30ec295c8709.jpeg
 
Decided to change out my handlebar from superbike style, which I’ve always had on my other liter bikes. ie: ‘82 KZ1000J and ‘83 GS1100ED. Worked well on those so when I put the bar adapter on last year, it felt only natural. Even with bar risers, I would get a crimp in my neck and shoulders after a hour or so…. No adjustment or positioning would help.
After researching, I went with Daytona Touring style and WOW… Did over 300 miles and 7 1/2 hours and no soreness or pain at all. At least not in the neck or shoulders.🤪
Didn’t seem like the rise was that much different but it felt like it.
Still didn’t have to mess with cables or hoses
 
Last edited:
Installed the scoops in reverse position on top of the OEM fairing extenders. Filled the gap in with some foam pipe insulation. I don't use the inner heat shields during the fall and winter. The heat is turned up to 11.View attachment 37239
I was thinking of doing the same on my extenders. The inner heat shields are down on the side of the engine, correct?
Never thought of pulling those off in the cooler months.
 
Being from South Texas I don't normally have the same cold concerns y'all have.
But I once made a ride to Big Bend National Park in February (I think) and a cold front came thru.
{The Temps suddenly dropped from 70* 1 day to 18* the next morning}. :eek:
All I had with me was light gloves, a Mesh jacket, and rain gear. (err duhhh)
Additionally, some strange white stuff was falling out of the air (??).

On the bike, I blocked the scoops like Bud did, "and" added a piece of thin cardboard between the radiator and radiator guard. (to bring the engine temps up a bit)
(I think) I also removed the bottom screws in the inner fairings. (to allow the heat to come out in front of me).
That cardboard and rising heat made things more comfortable.

Is that an idea that that y'all can use?

Ride safe, Ted

PS: What was that white stuff? {Texas Grin} 🤠
 
C
Being from South Texas I don't normally have the same cold concerns y'all have.
But I once made a ride to Big Bend National Park in February (I think) and a cold front came thru.
{The Temps suddenly dropped from 70* 1 day to 18* the next morning}. :eek:
All I had with me was light gloves, a Mesh jacket, and rain gear. (err duhhh)
Additionally, some strange white stuff was falling out of the air (??).

On the bike, I blocked the scoops like Bud did, "and" added a piece of thin cardboard between the radiator and radiator guard. (to bring the engine temps up a bit)
(I think) I also removed the bottom screws in the inner fairings. (to allow the heat to come out in front of me).
That cardboard and rising heat made things more comfortable.

Is that an idea that that y'all can use?

Ride safe, Ted

PS: What was that white stuff? {Texas Grin} 🤠
Could have been what I rode with in Maine, a few years ago🤔🤓
E2F4A126-7343-49C3-9F53-E01F0A45075F.jpeg
 
Replaced the sun-faded rear tail section on my ’95. Sat out too many days in the hot VA sun in the parking lot at work when I used it in my daily commute. Nothing wrong with it mechanically, just swapped it out for aesthetic reasons. Found a decent one on eBay at a reasonable price about a month ago, and finally got around to changing it out.

Also swapped out the scoops with the fairing extenders; getting about that time.
 
Last edited:
You have the Storz bar mounts on your bike?
It's not a storz. I believe it is the mount that Murph used to sell. This was Fred Bowen's bike if you remember him. He lives in Cookeville,TN. He had an article years ago in the Concourier about his trip out west, pulling the trailer I got with the bike behind it. Nice guy he was.IMG_20231024_045307_319.jpgIMG_20231024_045123_820.jpg
 
It's not a storz. I believe it is the mount that Murph used to sell. This was Fred Bowen's bike if you remember him. He lives in Cookeville,TN. He had an article years ago in the Concourier about his trip out west, pulling the trailer I got with the bike behind it. Nice guy he was.View attachment 37251View attachment 37252
Gotcha. Thanks.

Was curious because I only knew one other fella that had Storz risers on his Connie, and that was years ago..
 
Gotcha. Thanks.

Was curious because I only knew one other fella that had Storz risers on his Connie, and that was years ago..
I had one with the Daytona handlebars that I gave to George Kreamer after he was unsatisfied with a daylong seat I sold him.
 
The other night before I slammed into the median curb, I noticed that I had at least one bulb out in the instrument cluster. Once I determined that I hadn't destroyed my bike with the curb episode, I decided to order LED replacements (Superbrightleds.com) and change them all out. Ordered colored where colored lens are used, and cool whites for the once doing illumination duty. I'd changed out the clock bulb to an LED a few years ago, so left it alone.

Being a rainy, pi$$y day outside , looked like a good time to do the deed. Pulled the instrument cluster and swapped out all the bulbs. I tested it out before completely putting it back in place and all lamps lit as they should. No way in Hades am I lucky enough to put 9 LEDs in place and not have to switch any around due to incorrect polarity, so they must have come up with some rolarity-correcting scheme in these later generation of bulbs. If I did luck out, think I'll go pick up a lottery ticket. (Kidding - I don't gamble). Curious tho', so I'll drop them a note about it once I get back in the house.

This also gave me a chance to look a little closer at the bike, and to snug up the steering head bearings a bit. The steering loosened up slightly after hitting the curb. No head shake issues, but it was a little looser than I like. We'll see how I did once I get it back off the lift.


IMG_1751-L.jpg


IMG_1754-L.jpg


FWIW - Not as much glare as seen here in real life.
 
Last edited:
Looks great Guy. Those bulbs are a lot brighter.

Dean

I remember one of the first generation batch of LEDs I installed in my '86 Connie way back when. Pitiful. I wound up taking them out.

Not all that long ago, maybe 15 years, I eventually found a Wagner incandescent that worked pretty well for the clock. Then about 2 years ago I found an LED that illuminated the clock's face like you see in the pix. I was happy as poo because a lot of by long trip riding was done at night.
 
Very nice Guy. Might have to be my next Farkle.
Spent some time yesterday synching my carbs. Did them a few months ago but have been chasing down a backfire on decel. Checked all the exhaust and no leaks and tight. Got the carbs dialed in and level with my Carbtune and the back fire is gone. Bought the tool years ago and has been awesome ever since on many bikes.
Now waiting for the (3) carb bung caps to come in. The 20 year old ones gave up the ghost.
 
I've done the same with my last two C-10s. It's very impressive looking - especially at night. I went with the green LEDs, Superbrightled is a good outfit to do business with.
 
Placed an order today for my superbrights LEDs. Could be just the things as I have some dark riding coming up to head down to the Last Blast ride in a few weeks.
Be a perfect test
 
I finally fixed my oil leak. Or rather, my neighbor who rides and wrenches (and has slightly smaller hands than me), was able to reseat the elbow in both the airbox and the trans vent.

I LOVE my upgraded LEDs for my cluster. Superbrightleds is fantastic.

Also, having upgraded lighting is a GREAT thing. I've got the BeamTech LED headlight, some Nilight LEDs, and a pair of Hella HIDs:

20231021_200050.jpg

Lights off:

20231113_201818.jpg

Headlight with Highbeams:

20231113_201603.jpg

All lights on:

20231113_201803-EDIT.jpg

-x01660
 
Last edited:
Wow, that is some lighting!

Did you go with LED for the marker and tail lights too? If so, which bulbs?

What headlight bulb do you have? I have a Cyclops 10.0 H4 in my ZX600-C (which has nearly the same headlight assembly) and am pretty happy with it, but am curious about other good options for my new Concours. The cyclops has done well for 2 seasons of riding on the 600, and it has a built-in fan that keeps it running cool (it's quite and unubtrustive too). https://www.cyclopsadventuresports.com/Cyclops-100-H4-LED-headlight-bulb_p_192.html

The Concours came with a nice auxiliary light bar across the lower fairing with a set of PIAA lights and some odd little spotlight things on top (they each have separate switches added to the dash). The PIAAs look pretty nice, and I'm interested if LED bulbs in them are worth it (I'm always a fan of decreasing electrical load on old bikes). I am having Larry Buck upgrade my junction box as we speak, and all the aux lights (and even the stock headlight) are currently powered off an auxiliary fuse block, so the extra load is done right.

Here's a photo of the aux light bar on my bike (sorry, I realized I didn't take another photo before I tore it down for working on it this winter, so the one I took when I got it home is the best I have of it assembled).
 

Attachments

  • PXL_20231029_203855953.MP.jpg
    PXL_20231029_203855953.MP.jpg
    257.5 KB · Views: 57
That’s the first time I’ve seen lights mounted low like that. Interesting idea. If you put them back when you re-assemble, I’d like to see more of it👍👍
I'll try and remember to get a better picture. It's definitely a manufactured mounting bar, as it's an elegant shape cut from 1/2" aluminum and powder coated a hammered black finish. It mounts across the front of the mid fairing using longer bolts into existing front 6mm holes with spacers. I'm definitely keeping it on, but considering tweaking the lights after I figure out how they work.
 
The other night before I slammed into the median curb, I noticed that I had at least one bulb out in the instrument cluster. Once I determined that I hadn't destroyed my bike with the curb episode, I decided to order LED replacements (Superbrightleds.com) and change them all out. Ordered colored where colored lens are used, and cool whites for the once doing illumination duty. I'd changed out the clock bulb to an LED a few years ago, so left it alone.

Being a rainy, pi$$y day outside , looked like a good time to do the deed. Pulled the instrument cluster and swapped out all the bulbs. I tested it out before completely putting it back in place and all lamps lit as they should. No way in Hades am I lucky enough to put 9 LEDs in place and not have to switch any around due to incorrect polarity, so they must have come up with some rolarity-correcting scheme in these later generation of bulbs. If I did luck out, think I'll go pick up a lottery ticket. (Kidding - I don't gamble). Curious tho', so I'll drop them a note about it once I get back in the house.

This also gave me a chance to look a little closer at the bike, and to snug up the steering head bearings a bit. The steering loosened up slightly after hitting the curb. No head shake issues, but it was a little looser than I like. We'll see how I did once I get it back off the lift.


FWIW - Not as much glare as seen here in real life.

"This also gave me a chance to look a little closer at the bike, and to snug up the steering head bearings a bit. The steering loosened up slightly after hitting the curb. No head shake issues, but it was a little looser than I like. We'll see how I did once I get it back off the lift."

Finally had a chance to get the bike out on the road again today. Educated guess with the bearing tweak seemed to put it right in the zone. We're happy.
 
Replaced my taillights, license plate light, and cluster bulbs with LEDs. WHAT a difference!

Got it all buttoned up, and guess what I forgot to do....

🤬

-x01660
 
Probably forgot to plug something in up behind the instrument cluster!
I did....

At least I'm gonna have to take it all apart to replace my front turn signals with LED bulbs today, and ill be swapping out the cluster bulbs with purple ones (blue is too bright).

So not all is lost. But grrrrrr.....

-x01660
 
I did....

At least I'm gonna have to take it all apart to replace my front turn signals with LED bulbs today, and ill be swapping out the cluster bulbs with purple ones (blue is too bright).

So not all is lost. But grrrrrr.....

-x01660
I know the feeling! When I've done engine swaps or other major engine or trans work on a car, I assume that there's always one wire or connector somewhere that I haven't plugged in (or vacuum, hose, etc). I usually just hope it's one I can reach without disassembly.

BTW, I just placed an order for a couple different LED 1157 and 1156 bulbs on Amazon that I'm going to test out. I'll report back and let everyone how they look for brightness, color, etc. I'm aiming to get both the Connie and my 600 with some improved lighting over this winter. I'm planning to put Skene lights on the 600 too, and if I like them, maybe I'll put them on the Connie later on. The P3 rear module is available with decel brake light activation, so I'm planning to have it run my stock taillight in addition to the add-on modules that I'll mount to the license plate. I'm not 100% sure how it's going to work, but I'm pretty sure I'll need LED bulbs for that to work properly anyway. I'm going to make up my own adapter harness with stock-style connectors so I don't have to cut any of the stock wiring, and can more easily swap configurations around if I don't like my first try. Also planning to do some of that on the Connie to get rid of a bunch of Scotchlocks from the aftermarket wiring on it. Just need to figure out all the combinations of connectors I need and get my order in at Eastern Beaver.
 
Got up bright and early to drop Voyager off for some new rubber!!

20231212_091357.jpg

20231212_091402.jpg

I take my bike to Urban East, located in Lorton, VA. They specialize in carbureted motorcycles, and won't work on anything newer than about 2008. And as you can see, business is booming!

20231212_090134.jpg


20231212_085712.jpg

They'll have her done today, then I'll get to report on these Pirellis. I got an Angel GT for the front, and a Night Dragon GT for the rear. Here's to MANY more miles and smiles!

😎

-x01660
 
HA! My $20 Ebay score came in!!! With the hardware in the bag, with the Kawasaki paperwork!!

It was only the bracket for the grab bars, but the backrest portion of the other backrest that I bought from Roger has the holes in the exact same place. So:

20231213_173728.jpg

20231213_173755.jpg

20231213_173734.jpg

20231213_173740.jpg

The missus is VERY happy; said it was really comfortable and confidence inspiring!!

All that's left is that bracket to move the topcase back, and I'll be set!!

😎

-x01660
 
HA! My $20 Ebay score came in!!! With the hardware in the bag, with the Kawasaki paperwork!!

It was only the bracket for the grab bars, but the backrest portion of the other backrest that I bought from Roger has the holes in the exact same place. So:

View attachment 37530

View attachment 37531

View attachment 37532

View attachment 37533

The missus is VERY happy; said it was really comfortable and confidence inspiring!!

All that's left is that bracket to move the topcase back, and I'll be set!!

😎

-x01660
Wow, very nice! I wonder if that's the same bracket I saw listed back when I was poking around on ebay.

I think your backrest pad and backing plate is the same one that came with my bike. The mounting bracket I have clamps onto both ends of the grab bars, and is really secure, but it kind of awkward looking and does prevent you from actually holding onto the grab bars. I've asked around, but no one knows who made it.
 

Attachments

  • PXL_20231206_004555599.jpg
    PXL_20231206_004555599.jpg
    169.2 KB · Views: 27
  • PXL_20231206_004544186.jpg
    PXL_20231206_004544186.jpg
    181.1 KB · Views: 24
Wow, very nice! I wonder if that's the same bracket I saw listed back when I was poking around on ebay.

I think your backrest pad and backing plate is the same one that came with my bike. The mounting bracket I have clamps onto both ends of the grab bars, and is really secure, but it kind of awkward looking and does prevent you from actually holding onto the grab bars. I've asked around, but no one knows who made it.
Yup! That's the same backrest!

-x01660
 
I wonder who sold them?

I did pick up a Kawasaki backrest assembly, but the back pad is very low. I never thought to try the other backrest on the bracket, so now you've given me an idea.

Its solid. And it goes up to the bottom of my fiance's shoulderblades. And its SUPER SUPER rigid. As in I could push or lift the bike from the backrest.

If its the OEM backrest, then the backrest part should bolt out, and the other backrest should bolt right in.

-x01660
 
So after my little back and forth with Seth above, I got to thinking. And grinding. A little trip to the hardware store, and I FINALLY got what I wanted to do all along!

20231214_150348.jpg

I cut the arms off the side of the other backrest (it broke AGAIN, and this time along the side arms), and the holes aligned with the OEM bracket. I was then able to attach the GIVI metal plate to that, then the plastic tray.

20231214_150357.jpg

The support is just a couple of long bolts that go through the luggage rack mount points.

20231214_150408.jpg

On the underside, I have these magnetic bracket things (solid steel) that the bolts rest on.

20231214_150432.jpg


Top case won't open all the way and stay open, but it opens enough to fit anything that I'd need in there.

Overall its VERY stable with little play. The support bolts help A LOT. Again, Archimedes was right.

I will say that I'll have to slow down when I have that topcase on there; I can DEFINITELY feel it when leaning over.

But overall, success! And the best part is that I can take the tray portion completely off by just undoing those two bolts.

😎

-x01660
 
I bought new tires!

Probably won't get around to installing them for a couple months, but I pulled the trigger when I found them in stock, as so many options are out of stock now, and I wasn't confident I'd find them available when I actually need them. Especially Avon's, as Goodyear closed their UK factory and is moving production elsewhere.

The tires on the bike now are OE-spec Dunlops with very few miles, but, with a 2006 date code!1000003734.jpg
 
I bought new tires!

Probably won't get around to installing them for a couple months, but I pulled the trigger when I found them in stock, as so many options are out of stock now, and I wasn't confident I'd find them available when I actually need them. Especially Avon's, as Goodyear closed their UK factory and is moving production elsewhere.

The tires on the bike now are OE-spec Dunlops with very few miles, but, with a 2006 date code!View attachment 37584


I really like these ( on my 3rd set now) There are some that have had issues though . I have noticed that they are real sensitive as far as pressure . I run 40 lb front , 42 rear .
 
I really like these ( on my 3rd set now) There are some that have had issues though . I have noticed that they are real sensitive as far as pressure . I run 40 lb front , 42 rear .
Thanks for the advice! I won't be hauling a lot of weight (myself at 175lb, wife at 150-something on the occasional shorter trip, and just the side cases), so hopefully that keeps me clear of any load-related issues.

BTW, I'm going to have to get used to these high pressures and remember them! I run the Sport Demons on my 600 at the factory-specified 32psi front, 36psi rear. I haven't experimented with other pressures (except for a few psi lower when I forget to check them), but it's always felt good to me, and no issues with unusual wear. It's a much different bike, though. Wet weight as mine sits is just a bit over 425lbs.
 
I have been running mine at 42 rear and 36 front. I am on my 4th rear. I have 2 c-10s and 3 rear wheels, so as one tire is getting low on tread the wheels get swapped between bikes based on what the projected usage might be. Week long ride or weekend/commute use. My spare wheel is all set up with brake disc and drive parts. That way I get the most use out of the tire possible. On the rear the small z shaped groves work as wear indicators. I have them on my Versys 650 also.
 

Attachments

  • 20200911_120402.jpg
    20200911_120402.jpg
    219.5 KB · Views: 16
Digging into my carbs today. Two pilot jets were plugged solid, and there was plenty of gunk in the bowls. I have a spare set of carbs that came with the bike, so I pulled the pilot jets from those and cleaned them all, and will use the best ones.

I don't use it a lot but when I do, I really appreciate the ultrasonic cleaner. I use Simple Green Pro (the purple stuff), and it gets carbs looking brand new .

A few of my other tricks is using Flitz to polish any brass parts (idle screws, enricher plungers, etc), and using Flitz with a Q-tip on a drill to polish the float valve seat. I also like to polish the slides with Flitz, but that's probably overkill.

I'll be installing overflow tubes before I reassemble them.

1000003748.jpg1000003749.jpg

1000003762.jpg

1000003763.jpg
 

Attachments

  • 1000003762.jpg
    1000003762.jpg
    198.7 KB · Views: 12
Got my '95 back from the shop Wednesday. New steering head bearings and Race Tech gold valves installed. It's still firm due to the Sonic 1.2 kg/mm springs, but the really big thing I noticed was the improvement in high-speed damping. I took some of my favorite back roads on the way home to give the forks a workout. These are narrow, rough roads that don't see much maintenance or traffic. Now, the front end behaves even over rough spots while braking.

Weather looks good for today and tomorrow - should get some more seat time in to further evaluate.
 
Digging into my carbs today. Two pilot jets were plugged solid, and there was plenty of gunk in the bowls. I have a spare set of carbs that came with the bike, so I pulled the pilot jets from those and cleaned them all, and will use the best ones.

I don't use it a lot but when I do, I really appreciate the ultrasonic cleaner. I use Simple Green Pro (the purple stuff), and it gets carbs looking brand new .

A few of my other tricks is using Flitz to polish any brass parts (idle screws, enricher plungers, etc), and using Flitz with a Q-tip on a drill to polish the float valve seat. I also like to polish the slides with Flitz, but that's probably overkill.

I'll be installing overflow tubes before I reassemble them.

View attachment 37588View attachment 37589

View attachment 37591

View attachment 37592
What size cleaner do you have there ? Can you can get the whole bank of carbs in it ?
 
I actually have a question about this; the PO gave me a full set of carbs as part of the pile of parts he gave me with Voyager; would it be worth it to send them out to get cleaned and have overflow tubes put in? How long will a freshly cleaned set of carbs be good off a bike? Will seals dry out?

And how long can I go before I should be looking at cleaning the carbs currently on Voyager? If I keep gas flowing through her daily, is there still a point where I should get in there and clean them?

-Z
 
What size cleaner do you have there ? Can you can get the whole bank of carbs in it ?
I have a 10L size. I can't quite fit a whole assembled rack of carbs in, but I prefer to take them all apart anyway to clean the fuel rails, replace o-rings, etc.

I would probably get the next size up if I was buying another one, just so I could fit other bigger parts in, though. But, this one has been real handy for things like brake calipers, etc.
 
I actually have a question about this; the PO gave me a full set of carbs as part of the pile of parts he gave me with Voyager; would it be worth it to send them out to get cleaned and have overflow tubes put in? How long will a freshly cleaned set of carbs be good off a bike? Will seals dry out?

And how long can I go before I should be looking at cleaning the carbs currently on Voyager? If I keep gas flowing through her daily, is there still a point where I should get in there and clean them?

-Z
Just a heads up. Steve quit doing carbs. The shop that took that work over had a massive fire and is still down. Not sure where you would send them. There's an article in the Concourier called, Carbs, it ain't a diet thing, that was done by Rich Riczinger that was a former tech editor for COG. It details the process of cleaning carbs. Bikes that stay on the road tend to need a lot less cleaning as long as the tank stays clean.
 
Just a heads up. Steve quit doing carbs. The shop that took that work over had a massive fire and is still down. Not sure where you would send them. There's an article in the Concourier called, Carbs, it ain't a diet thing, that was done by Rich Riczinger that was a former tech editor for COG. It details the process of cleaning carbs. Bikes that stay on the road tend to need a lot less cleaning as long as the tank stays clean.

Ok. That is good to know. Is there some "trick" do doing the carbs? Or is it just doing the process and going slow and methodically? Essentially, is there anything that I won't know or be able to do because of a lack of years of experience? Or is it just an issue of I'll be able to do it the same, but it'll take me a lot longer?

These are the sorts of skills that I may want to pick up and at least get satisfactory at, especially since the 2 experts who do carbs are out of service right now. That represents a major issue for keeping C10s on the road....

Plus, I have an extra set of carbs I can play with, without taking Voyager off the road while I do it.

-Z
 
Slow and methodical should do it. Make sure all passages are clean. A carb balance tool will be helpful.
 
I actually have a question about this; the PO gave me a full set of carbs as part of the pile of parts he gave me with Voyager; would it be worth it to send them out to get cleaned and have overflow tubes put in? How long will a freshly cleaned set of carbs be good off a bike? Will seals dry out?

And how long can I go before I should be looking at cleaning the carbs currently on Voyager? If I keep gas flowing through her daily, is there still a point where I should get in there and clean them?

-Z

It's sitting with fuel in them (especially E10) that ruins carbs. If they're rebuilt and left dry, they should be good for years on the shelf in a conditioned space. If you use a bit of silicone spray on the rubber parts during assembly, that may give you even more insurance on preservation.

If the bike is running fine, doesn't sit for more than a couple weeks at a time, and doesn't get dirt in the carbs, then there really isn't a maintenance interval for rebuilding carbs. E10 (standard 10% ethanol fuel) is harder on rubber parts, so eventually some seals or O-rings might leak, but otherwise there isn't much to "wear out". Of course things like throttle bushings, slides, etc do wear out eventually, but usually longer than the life of the engine (and most of those aren't replaceable on these carbs anyway).

The smallest passages and jets will plug up first, which is idle, followed by the pilot circuit. On my other bikes, I notice idle and off-idle performance, especially when cold, are the first indicator of carbs that need cleaning/rebuilding. The main jets are an order of magnitude larger, and rarely plug. When I got my 600 and rebuilt the carbs after a year of riding it, I was amazed at how much better it idled and smoother it was off-idle. The idle circuits were mostly plugged, and the mixture screws were still at factory too-lean setting behind the sealed caps.

Overflow tubes are good insurance, but I'm not sure if there's anyone doing them commercially at the moment. I got the stuff for it and am going to be doing mine at home shortly. You can also find bowls off a Voyager, which had them from the factory.
 
Ok. That is good to know. Is there some "trick" do doing the carbs? Or is it just doing the process and going slow and methodically? Essentially, is there anything that I won't know or be able to do because of a lack of years of experience? Or is it just an issue of I'll be able to do it the same, but it'll take me a lot longer?

These are the sorts of skills that I may want to pick up and at least get satisfactory at, especially since the 2 experts who do carbs are out of service right now. That represents a major issue for keeping C10s on the road....

Plus, I have an extra set of carbs I can play with, without taking Voyager off the road while I do it.

-Z

I'm no seasoned expert, but have done a few sets of these Keihin CVKs on other bikes before (the only thing new to me on the Connie ones I'm doing now is the decel cutoff valve). Here are a few of my thoughts:
  1. Take a lot of pictures before you take them apart. It really helps you get stuff back in the right place and orientation later (this is a general rule I follow for anything I'm taking apart).
  2. Make sure you have a JIS screwdriver, not a standard phillips. The phillips-appearing heads on Japanese bikes and cars have a slightly different tool pattern, and a regular phillips driver is more likely to to round them off. Vessel is a reliable brand for quality JIS screwdrivers. You can find them on Amazon and plenty of other places
  3. If you are breaking the bank apart into individual carbs, the screws that hold them to the bars can be very tight, and the big ones are a JIS #3, rather than #2 bit. A hammer impact tool is handy for really stuck ones
  4. Carefully disassemble everything and make sure to keep track of all the little bits, O-rings, springs, etc. I like using little cups or trays to keep the parts straight.
  5. Check if the idle mixture screws still have the tamper seal caps over them. The shop manual shows where they are and how to remove them. If you don't know what you're looking for, they look like a pressed-in plug that's sealing a manufacturing drill hole (like the ones capping off the blind side of the vent ports, etc).
  6. The idle mixture screws have three additional parts in the hole: spring, then a steel washer, then the O-ring. Usually the spring comes out easily, but the washer and O-ring are stuck, so you have to carefully pick it out with something that won't scratch the bore
  7. After dissassembly, I separate the parts out in groups and put each group in ziploc freezer bags, which I then fill with cleaning solution, and immerse in my ultrasonic cleaner topped off with plain water around the bags. That way I keep the small parts contained, and avoid getting my cleaner all dirty.
  8. I use Simple Green Pro cleaner (the purple stuff). It works amazing. Regular Simple Green and some other cleaners can oxidize aluminum if left immersed for long.
  9. After cleaning, rinse all the cleaner off well with hot or warm water, then blow out and dry with compressed air
  10. After the ultrasonic cleaner, I soak the brass jets, emulsion tubes, and idle mixture needle screws in liquid toilet bowl cleaner, which cleans the brass up pretty well.
  11. Make sure the jets are clear, especially the pilot jets, which have a port so TEEEEEEENY you can barely see it with the naked eye (not joking). I will use a plastic brush bristle to make sure it's clear and clean, and a brass bristle if that fails. I really avoid using needles or steel stuff, as that can scratch or enlarge the jet port, which is soft brass
  12. Polish the needle seats. I've found that Flitz works really well, with a Q-tip in a drill. This can really help with effective float valve sealing.
  13. Before reassembly, I do a final clean on the carb bodies with spray carb cleaner in all the passages, making sure every one is clean and clear, then blow out with compressed air. The carb cleaner will dry out any remaining moisture from the water cleaning.
  14. I like to use some kind of lubricant on the throttle shafts. They ride in brass bushings in the carb body, but I don't know if they are self-lubricating bushings or not. I have used light oil before, but have switched to using a liquid graphite/moly dry lube lately, which seems to work well.
Otherwise, it's just a lot of careful keeping track of parts and where they go.
 
  • Like
Reactions: Bud
I'm sure others have their own convictions on carb and fuel for the off-season, but my preferred method is to run them dry at the end of the season before storage. E10 is hygroscopic, so it absorbs moisture from the atmosphere through the carb vents, where it will accumulate in the bottom of the bowls (right where the jets are). If you've ever taken apart an old lawnmower carb and found it full of white corrosion, that's why.

My winterization method is:
  1. Make sure the tank is full of non-ethanol fuel. The nearest station for me is an hour drive, so I make my own by extracting the water from E10 (if you add about 1 cup of water per gallon of fuel, it super-saturates the solution and the water and ethanol fall out of solution together, leaving pure gas that you can decant off the top). I drain the tank, then top off with the ethanol-free fuel
  2. Add Sta-Bil to the ethanol-free fuel (the research I've done suggests that fuel stabilizers don't do much to address the hygroscopic nature of ethanol-blend fuel, so despite marketing claims, you really need to start with ethanol-free gas)
  3. Take the bike for a ride to make sure the stabilized gas has flowed through all the carb passages. You could also drain the bowls manually first, and then just start up for idle a bit, but might as well enjoy a ride!
  4. Fully drain the carb bowls using the drain screws
  5. Top off the tank (if needed) to minimize the air space and prevent tank rusting
  6. In spring, I'll add a bottle of octane boost to the fuel in the tank, as it's possible that the removal of ethanol decreased octane. If you started with store-bought ethanol-free gas, then this isn't needed.

This has worked well for me over the years. On a vehicle with a plastic tank, I'll just run the whole system dry, but a steel tank needs something to keep it from rusting inside. When I have a tank off a bike for a while, I'll empty it, add a pint of oil, and tilt it around to coat the inside of the tank with oil (that's actually the recommendation for long-term storage in the owner's manual).
 
  • Like
Reactions: Bud
I’ve gone this route since I received my carbs back from the SISF carb spa a few years back and it works excellent.
Thanks for the suggestion, guys. I did some searching around past threads, and found the explanation. It makes sense as a bit of protection when the carbs go dry, especially from evaporation. On my 600, I notice the bowls evaporate in 3 or 4 weeks in Midwest summer weather if I haven't ridden it (the petcock on that doesn't have a prime setting, so to prime you have to either crank for a while to generate vacuum to open the petcock, or use a manual vacuum pump). It looks like some TCW3 2-stroke oil may be helpful for those times when it sits for a bit during the riding season.
 
Just got done changing my oil @ 3142 miles. Oil was still thick and still had a tinge of red to it.... Motul 7100 4T for the win.

Also got my tip over bars!!!! So excited! Now to put them on. After I just pulled my bellypan off, lol.

-Z
 
Ok. That is good to know. Is there some "trick" do doing the carbs? Or is it just doing the process and going slow and methodically? Essentially, is there anything that I won't know or be able to do because of a lack of years of experience? Or is it just an issue of I'll be able to do it the same, but it'll take me a lot longer?

These are the sorts of skills that I may want to pick up and at least get satisfactory at, especially since the 2 experts who do carbs are out of service right now. That represents a major issue for keeping C10s on the road....

Plus, I have an extra set of carbs I can play with, without taking Voyager off the road while I do it.

-Z


That article is in the Fall 06 edition of Concourier . Available in the archives to members . I had a bit of fear diving into the carbs before reading that .
 
That article is in the Fall 06 edition of Concourier . Available in the archives to members . I had a bit of fear diving into the carbs before reading that .
Great callout - the Concourier articles have many hidden gems.

Wayne, Carol & Blue
 
What are these "off-season" and "winterization" things that keep popping up? :D
Exactly this, lol. Though I guess I'm spoiled (or not) living in an area that doesn't get that much snow/ice.

Seriously, though. I'm good down to about 10*F. Below that, I start having issues with being cold.

Eh. Its good for the bikes. 😎

-Z
 
Exactly this, lol. Though I guess I'm spoiled (or not) living in an area that doesn't get that much snow/ice.

Seriously, though. I'm good down to about 10*F. Below that, I start having issues with being cold.

Eh. Its good for the bikes. 😎

-Z
Don't forget that cold tires can have some traction issues. My son found that out the hard way. Tibial nails aren't cheap.
 
Don't forget that cold tires can have some traction issues. My son found that out the hard way. Tibial nails aren't cheap.

I agree. I don't push it hard unless air temps are above 50, and the temp overnight was above 40.

Plus, I'm going on a long ride tomorrow (see Voyager's thread). About 400 miles. So I gotta pace myself. :)

-Z
 
Merry Christmas, everyone!!!

I did some work today. And damn that was a pain in my 4th point of contact.... But:

20231225_164209.jpg


20231225_164222.jpg

Bars are mounted!!! Thanks ZG/ZN Kim!!!

I also relocated my two LEDs; we'll see how illumination is now:

20231225_164202.jpg


Now time to test them (the lights, not the bars, lol)!!

-Z
 
Yes, please test the lights - bars… they’re fine!

Weather was phenomenal for Christmas Day, nearly 60*F in your area - WOW!!

Wayne, Carol & Blue

Yes it was! A perfect day to wrench. Glad it wasn't super cold. Spent about 3 hours doing the bars. And I had Vince Guaraldi and Chet Baker to keep me company. The missus is with family in Chicago, so I have the place to myself. Was really nice, not gonna lie. :)

-Z
 
If you want to get rid of the emissions on top of the valve cover, I have some Murphs block off plates that are yours if you want them. You’d just need a rubber plug for the top of the airbox.
Doug
Thanks for the offer! I almost bought a set, but then I poked around on eBay and found a cover from a bike sold overseas without the PAIR. I think it was off a GPZ900, but it's the same cover as our bikes. Just gotta get it cleaned up.1000003023.jpg
 
Top