• Can't post after logging to the forum for the first time... Try Again - If you can't post in the forum, sign out of both the membership site and the forum and log in again. Make sure your COG membership is active and your browser allow cookies. If you still can't post, contact the COG IT guy at IT@Concours.org.
  • IF YOU GET 404 ERROR: This may be due to using a link in a post from prior to the web migration. Content was brought over from the old forum as is, but the links may be in error. If the link contains "cog-online.org" it is an old link and will not work.

Valve Adjustment Tips for a First Timer

4bikes

COG#9715 AAD
Member
I wanted to share some tips for doing the Valve Clearance Adjustment on a Gen- 2 C-14. I hope others will chime in with their own tips. This is not intended to be an expert opinion or a step by step guide, but rather the intent is to help out a newbie that might have the same question and concerns that I had along the way. I'll also point to differences between the Gen 1 videos and the Gen 2 model.

Between the Service Manual, Fred's Video's and posts, and posts from Man of Blues, BDF, and Mad River Marc, all of the information is there to do the job right. These tips will hopefully pull many of those things together so you don't need to search them out.

Should I even start the Job?
First off, I was telling myself it was ok to wait until 25,000 miles to check the valves, and not the US/CA 15,000 mile interval. Many posts say that is ok. I checked with two local dealers, and aside from realizing the job was expensive after asking the price, I got two different answers. One said ok to wait, the other said you will want to check them, since they have come across tight valves. I had 13,750 miles on the bike, and plan to pile up miles this summer, and I decided to do the job myself over winter and not during prime riding season. I’m cheap, so the money savings was appealing. I also had a mental image of my C-14 scattered across a Motorcycle shop for days and getting unknown results. In the end, I felt confident in my abilities and decided to go for it. I’m not a motorcycle mechanic by any means, but over the years, I would always did my Periodic cycle and car/truck maintenance (4th Bike) and I do not hesitate to replace an alternator, water pump, etc on a car. But removing the cams after 1½ years? Are you kidding me; that is surely beyond my skills right? I have the tools, this Forum, and Fred’s videos. Turns out that is all you need.

I found 2 exhaust valves and 4 intake valves out of spec and tight, and the remaining 10 valves were on the tight side of the spec. They are now loosened back to 0.009 on the Exhaust, and 0.006 on the Intakes. In my opinion, checking and adjusting them at the early interval was a good idea. Others will dispute that I’m sure.

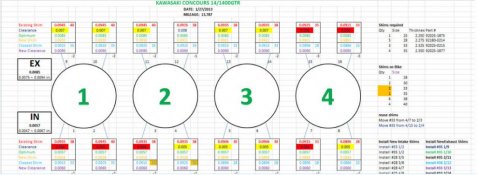
---CONTINUED----Shim Map.jpg
 
Last edited:
Getting Ready for the Job
You will want to be prepared for sure.
-Read the manual several times to determine the tools and parts you will need.
-Watch Fred's videos to make sure you have the skills and confidence to do the job.
-Watch Fred's videos again the week before you start (use 2X speed to get through the obvious parts)
-Be prepared to spend over a week on the project.  The key is not to rush, but to take your time and not get impatient and flustered.
-Make sure you have the correct tools.  I had most of the tools, but needed to pick up the following tools and used the forum for advice:

**Inch Pound Torque wrench that works (hated the Craftsman, bought this one and it works great: GearWrench 85051 3/8-Inch Drive Micrometer Torque Wrench 25-250 in lb $99.00

**Mechanical calipers: McMaster-Carr Micrometer 0" to 1" range Product number 2114A41  $25.23

**Magnetic tool to lift the buckets: KD Tools 18" Flexible Head Magnet Pickup Tool $13.69

-Set aside nearly an entire garage bay for the parts.  I spread a plastic sheet on the floor.  The plastic provides a clean surface, contains the oil, and lets you write down assembly and part ID's on the plastic.
-Call around to find a dealer that will swap shims.  Note that some use non-Kawi Hot Cam shims in .05 mm sizes.  You need to ask specifically if they have the Kawasaki shims that go down to .025 mm.  Without the half steps sizes, you might not be satisfied with the results.  Kawi also has a warning in the manual section 2-27 about using shims from other models.  Kawasaki and Honda apparently share the same shims.
-Buy your replacement parts ahead of time.  Gaskets, sub frame bolts, a few extra cable tie stays.
-Buy the parts and prepare to do other 15 K maintenance while the plastic is off.


Once you have the fairings off
-Tighten the Header bolts and torque them to 13ft lbs.  Note that one of the valve cover disassembly steps for Gen 2 is to loosen the radiator which makes this task a lot easier.
-Torque and tighten bolts and check over the wiring for chaffing
-Replace the cheapo spring radiator clamps with higher quality clamps
-Note that I did not change the Iridium plugs, due to forum advice

---CONTINUED----
 
Things I learned during the job
-Use the spreadsheet http://forum.cog-online.org/index.php/topic,34643.0.html to print out paper shim maps to record the readings, and then plug the info into the spreadsheet to calculate the shims. 
-Take lots of photos of the fairing stays, sub frame parts, electrical connectors and cable routing.  These photos are invaluable during reassembly.
-Once the valve cover is removed, put a clean rag into the cam chain hole to prevent stuff from falling down into the crankcase.
-Be super careful when lifting the cam caps.  The dowel pins do one of three things.  The dowels either stay with the engine block, with the cam cover, or they fall out.  I moved all dowels to the engine block after disassembly since nothing ever falls up. Despite being careful, I did have one dowel pin fall into the head.  There are many nooks and crannies for the dowel to go.  It took a long time with a mirror and a flashlight, but I found it and plucked it out with a magnet tool. (Would a dealer do that search or just let it go?)
-Once you determine your required shims, take your shim maps and calipers to the dealer.  Do not trust the non stamped shims they give you.  The dealer’s cheapo digital caliper was reading a full size smaller than my calipers.  So if a shim mark was missing, he was handing me a size too small.  This extra 10 minutes to verify the shims at the counter was important.
-If you have Top Block and other Farkels, you will understand their disassembly and reassembly better than the dealer.

Setting the Timing Marks
-Setting the timing marks was the most stressful part, because the Cams and Chain want to move as you torque the cam covers.  You really start to question if your timing marks are correct since the chain can actually lift off of the gears. 
-The Intake cam also rotates clockwise more than the other cam as the cam lobes for cylinders 1 and 2 depress the valve springs.  This bunches and lifts the cam chain.

Use these tips and it will work out:
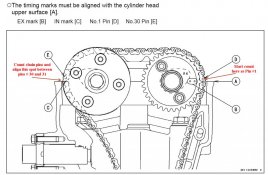
-The video does not show the step in the manual section 5-19 of counting the timing chain link pins.  This is a key step in setting the intake cam position. Pin #1 is the first pin above the two dots on the Exhaust cam.  Count 30 pins moving counter-clockwise from the exhaust mark to the scribed line on the intake cam.  That intake cam mark will line up exactly between time chain links #30 and #31.
-Note that I tried the tip of cleaning the chain link and sprocket, and marking it with a sharpie.  That mark faded to nothing when I needed it.  Counting the chain links per the manual will reassure you all is well as you torque the cams and things move.  Paint may work better.
-As mentioned, as you tighten the cams, the cam chain sprockets will move and bunch the Cam Chain.  I learned from Mad-River Marc post…..do not try to manage the chain with the tensioner or the back side of the chain.  Do not apply tension to the chain until the manual says to do so.  Follow the chain tension steps exactly as the manual says.  You do need to manage the chain on the top.  You can apply pressure downward  between the two cam sprockets to take up the slack and keep the chain from lifting of the sprockets.  Do not torture the cam chain in any way.  You can put a small wood wedge between the chain guide and the chain.  Do not put a lot of force on the chain but do put enough force to keep the chain on the sprockets.
-Even though counting the timing chain link pins will give you a high degree of confidence that things are correct, the absolute check is to match up the Exhaust timing dots and the Intake scribed line with the head (below the Head gasket).  The marks while being off substantially at first, should be pretty much exact after turning the engine by hand and lining up with the 1-4 marks on the Cylinder Head upper surface (not the top of the gasket).  If the marks are 180 degrees out, turn the crankshaft 360 degrees back to the 1-4 mark.  Do not consider reinstalling the valve cover until you are 100% sure things are lined up.
-The manual says to listen for the cam chain tensioner to release as you rotate the engine two times by hand.  I could not hear it.  I removed the tensioner and it had released.  I tried it again, and did not hear it, and checked it again.  It had released.  My confidence was high that after the third time it was releasing without a detectable noise.  It worked great during startups after the job as well.
-Overall, keep Fred's videos handy and watch them in sequence as you do the job.  As much as you think you know all the steps, this method will keep you on track.  You really can't go wrong and forget something with this method.

---CONTINUED----
 
Differences noted between the Gen 1 Video and the Gen-2
-Obviously the fairing removal and installation for the Gen 2 is different.  You want to be sure to watch Fred’s Disk #10 that addresses the changes in detail. 
-The 2011 air dam is much different than Fred's video.  He struggled getting the Gen 1 air dam removed and installed.  On the Gen 2, you need to loosen the two upper radiator bolts and the horn mounting bolts and the air dam slides forward.  Getting the radiator bolts reinstalled was difficult.  I ended up using a floor jack to get it positioned properly for the bolts and collars.
-The right side frame sub member was very difficult to reinstall on the Gen 2 compared to the Gen 1 video due to the air dam.  I removed the air intake hose from above the member to get the correct angle.
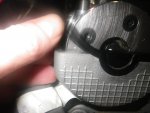
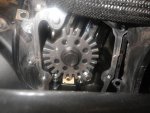
-The Exhaust and intake markings and are different for the Gen-2 compared to the video.  See Picts.
 

Attachments

  • Exhaust Cam Marks.jpg
    Exhaust Cam Marks.jpg
    67.1 KB · Views: 385
  • Intake Timing Mark.jpg
    Intake Timing Mark.jpg
    146.6 KB · Views: 409
  • Crank Shaft Timing Mark.jpg
    Crank Shaft Timing Mark.jpg
    130.9 KB · Views: 386
Summary
This job took a long time. Ignore repeated questions from the wife about parking the car again in the garage.  I was prepared; it was winter (she scraped the windshield), and I was in no rush to ride.  The next time will much faster.  With the clearances set to the loose side of center spec, I'm confident I can go 25,000 miles before checking again if I choose to.  I was surprised that so many valves were out of spec.  In a way I'm glad they were, since it would have been an agonizing decision to pull the cams just to move the clearance to the center.  Since I pulled them, I now know every valve is perfect.  I also know that my motorcycle is clean inside and out, and that every cable, harness, hose and connector is correct. 

What I lacked in experience, I gained by the videos, the knowledge of others in the forum and the ability to go super slow and make sure it is done right with the knowledge at hand. A professional mechanic might laugh at me, and the service manger would fire me for taking so long.  But this is my hobby. I didn't have a single "oh sh$T" moment, and told myself over and over to take my time, clean parts along the way, and make sure it is right.  I'm convinced that while a motorcycle mechanic may arguably have more ability from experience, they could not spend the amount of time to do the job like I did.  The half shim sizes, incorrect calipers, etc makes me wonder what I would have ended up with if I had dropped the C-14 off at the dealer.

In some respects, removing the fairing and sub-frame is just as complex as the valve steps, and you would need those first steps just too actually do some of the more rudimentary service on the C-14.  I guess what I'm saying is that if you have trouble getting to the point of removing the valve cover, you might want to stop and go no further.  I did it, and I suspect others can too. That said, I will not openly recommend that everyone do this.  Thanks to Fred and everyone that posted tips along the way.  I couldn't have done it without you.

If nothing else you will get personal satisfaction and an appreciation of the engineering, machining, and assembly that went into this awesome machine.  You will also surely appreciate the challenges that a professional motorcycle mechanic faces every day.

I look forward to tips and suggestions from others with perhaps more experience than I have.  I hope this information helps someone along the way.
4Bikes
 
Nice write up, thanks for taking the time.  I'll be doing mine maybe later this year at 25K. I have to finish watching Freds videos still and get some of the tools, but I'll be doing it myself.

BTW...where did you get the shim map excel file?
 
4Bikes said:
-As mentioned, as you tighten the cams, the cam chain sprockets will move and bunch the Cam Chain. 

I read this before I set my cams in this morning and it still didnt register.  I got all the caps on and loose and the timing marks were off!  Finally I remembered to count the pins in the chain as the exhaust cam was still lined up.  Low and behold, even though the timing marks on the Intake cam were off, the chain was bunched up and it just appeared to be off.  Thanks for your insight!  It DID save me some time this morning. 

A couple of things I might add -

Every Kawasaki dealer within 50 miles of my house did NOT carry half size shims. (0.025mm Step)  They only carryied 0.05mm step shims.  Before you do anything, find the shims you want to use, or be prepared to wait for mail order parts.  The only problem I have with the Hot Cams type of shims is that its nearly impossible to set the valves in the middle of the spec.  They're either tight or loose (Mine are all loose)

Measure with a micrometer both the shims you take out and the shims you install.  Hand calculate the new shim sizes to back up what the excel spreadsheet tells you.  It takes the surprise out of the calculations and the expected new clearence.  The shims I took out were up to 0.0005" off from what they should have been. 

Above all, take your time and dont get in a hurry.  Dropping a shim into one of the nook and cranny's of your head will ruin your day....  :beerchug:
 
Thanks 4Bikes, muchly appreciated and will be useful when it comes time.  Normally I would not tackle something like this but with posts like these, the Kawasaki shop manual and Fred Harmon's DVD's I feel comfortable enough to tackle it.
  Thank-you!!! :beerchug:
 
all the above advice, plus, take LOTS of pics during disassembly!  you would be amazed at how helpful it is to see an image of what should be when putting things back together!
 
Thanks for the comment. I’m responding to a PM question and thought this diagram will better explain this key step in setting the alignment marks.

-The video does not show the step in the manual section 5-19 of counting the timing chain link pins. This is a key step in setting the intake cam position. Pin #1 is the first pin above the two dots on the Exhaust cam. Count 30 pins moving counter-clockwise from the exhaust mark to the scribed line on the intake cam. That intake cam mark will line up exactly between time chain links #30 and #31.

timingchain.jpg
 
Last edited:
Thank you for the thorough write up.

I'm contemplating letting this go until 25k or knocking it out this winter when I'm closer to 15k.......

 
Madman said:
What is the mileage that this suppose to be done for the first time and there for after?

The service intervals are listed in the owners manual. The U.S. and Canada C-14's (yes, even California models) are specified by Kawasaki to perform the valve clearance inspection at 15,000 miles (24,000 kilometers). Everywhere else in the world, that valve inspect interval is at 26,000 miles (42,000 kilometers). Since the engines are the same around the world, many say it's ok to wait for the longer interval, with the shorter interval likely put in place due to an EPA mandate or some other reason.

Since there is no way of knowing how the valve lash was set from the factory, and what situation causes some to report tight valves early and others (mostly dealers?) reporting "all valves are in spec", you will hear many different interval rationales for this service. But, there is only one way to know where your engine stands, and that is to check them, preferably with you own feeler gauges.

I think that if you center the valves and know they are in good shape at the first check, the longer interval makes sense. There is not a lot of info that I found on this particular topic. I suspect the tolerances don't change much on subsequent checks.  Maybe someone else can report on this one?
 
Well, there IS a lot of info. on shim- under- bucket cam folower valve lash spec's, just not all regarding C-14's specifically. There is a fair amount of data about ZX 14 but especially, various other Japanese bikes. Other than pure sport bikes, especially those owned by kids (and who else can fold up enough to ride them other than kids?) look around for any type of valve train failure on a modern Japanese motorcycle.

One of the main things to remember about this whole topic is that 'out of spec.' does not mean it is causing or likely to cause any damage. There is no reason the valve lash on one of our engines could not be a thousandth of an inch above or below the range specified and stay there for the life of the engine.

I am not advocating not checking the valve lash at regular intervals, nor am I saying the intervals should be anything other than what Kawasaki specificies. What I am saying is that this issue, like most things, should be taken with reason and some consideration rather than the all too typical terror that often surrounds this issue. A lot of perfectly logical sounding judgements really do mean anything at all: the most common is 'Wow, I checked mine at XXXX miles and 7 out of 16 were tight!'. Fine but were they tight at 1,000 miles? Unknown. The implication, and it is a pure assumption, is that they started in the middle of tolerance and have moved steadily toward the current, 'too tight' state. There is nothing to support that thought and it is merely an opinion unless the engine were checked at at least several intermediate intervals to see that the valves in fact were getting progressively tighter in any kind of steady fashion.

But I think everyone should think about what is going on here and make his / her own decision. Or just be terrified- whatever works best.  ;D

Brian

4Bikes said:
<snip>

I think that if you center the valves and know they are in good shape at the first check, the longer interval makes sense. There is not a lot of info that I found on this particular topic. I suspect the tolerances don't change much on subsequent checks.  Maybe someone else can report on this one?
 
The goal of this thread is to provide tips for actually doing the valve clearance check and adjustment. Here is a great tip offered by Rembrant from another post. Does anybody else have a good tip?

Rembrant said:
I always remove the radiator when doing the valves on my own bikes or anybody else's. If you're going all the way in there, and removing all of that bodywork, why not pull the radiator and flush it, and change the coolant while you're at it? You're only talking en extra hour of work, and a $20 jug of coolant. The radiator is just hanging there, wide open when you're in that far.

On a bike like the C14 that has trouble shedding heat, it sure doesn't hurt to clean the radiator out. I lay the radiator face down in my laundry sink, and back flush the fins...you'd be surprised how much dirt and debris comes out of there.

I'm sure not all will agree, but I always suggest removing and cleaning the radiator as part of the whole valve check/adjust job. In the grand scheme of things, it doesn't add much time or money to an already big job, and it allows easier access to the top end.

JMTCW.
Rem ;D
 
Carefully inspect and replace as needed any or all of the O-rings on the oil pipes on the right / top of the head. The O-rings tend to get nicked up and will result in small oil leaks; it is a cheap and very easy thing to do.

Brian

4Bikes said:
The goal of this thread is to provide tips for actually doing the valve clearance check and adjustment. Here is a great tip offered by Rembrant from another post. Does anybody else have a good tip?
 
4Bikes said:
The goal of this thread is to provide tips for actually doing the valve clearance check and adjustment. Here is a great tip offered by Rembrant from another post. Does anybody else have a good tip?

here's the tip I will preach from now to eternity...
when you are in there, measuring the actual shim thicknesses with a mic, take the time to measure the thickness of each bucket's head.
Record this also, it comes in extremely handy when you are swapping shims around and seem to think you need to buy a bunch. Some time and effort doing the math for total thickness WILL save you shims. Swapping the buckets is perfectly ok to do. especially when trying to achieve those max limit clearances that seem to be elusive with the shim selection available. The heads of the buckets vary by as much as a shim size increment.
Notice the cup thickness I have recorded in my shim chart, and the amount they vary....swapping some made perfect sense..


there's your "free prize in every box" tip from M.O.B. :beerchug: :great:
 
Maybe not a tip, but words of encouragement to do the job yourself.

Fred_Harmon_TX said:
Diderot said:
Being a motorcycle owner in 2012 means we can expect to buy incredibly well designed and made motorcycles but not expect particularly skilled or professional mechanics. All progress involves some trade offs. If you are capable of performing skilled, professional service on your own motorcycle you are enjoying the best of two different times in the development of manufacturing history; a lucky position to be in.
I suspect the existence of forums, such as this one, exist to satisfy the desire of capable, curious owners to own modern sophisticated products and develop skills that have limited market value.

I tend to agree. I also believe no one will ever maintain a motorcycle better than the owner, and I'd encourage all owners to try to learn how to do as much of their own maintenance and repair as possible.
 
Posted by: MAN OF BLUES

"Swapping the buckets is perfectly ok to do."

Fred Harmon advises against this in his videos. 

Anyone have a more detailed explanation of the pros and cons/reasons of moving/not moving the buckets around? 

Just curious.

 
Fuzz said:
Posted by: MAN OF BLUES

"Swapping the buckets is perfectly ok to do."

Fred Harmon advises against this in his videos. 

Anyone have a more detailed explanation of the pros and cons/reasons of moving/not moving the buckets around? 

Just curious.

  In the olden days of engine building and metalurgy, cams and followers would work in with each other and develop thier own pattern, or so it was claimed. in that case it was best to keep the parts that were "mated" together. In todays engines, the surface hardenings are so effective there really isn't any mating or metal loss going on. Fred is, I'm sure, coming from a position of "an abundance of caution", But may years of engine building has taught me with todays engines swapping buckets is a perfectly acceptable practice. Steve
 
Steve in Sunny Fla said:
Fuzz said:
Posted by: MAN OF BLUES

"Swapping the buckets is perfectly ok to do."

Fred Harmon advises against this in his videos. 

Anyone have a more detailed explanation of the pros and cons/reasons of moving/not moving the buckets around? 

Just curious.

  In the olden days of engine building and metalurgy, cams and followers would work in with each other and develop thier own pattern, or so it was claimed. in that case it was best to keep the parts that were "mated" together. In todays engines, the surface hardenings are so effective there really isn't any mating or metal loss going on. Fred is, I'm sure, coming from a position of "an abundance of caution", But may years of engine building has taught me with todays engines swapping buckets is a perfectly acceptable practice. Steve

thanks Steve, I'll further clarify,
back in time on the KZ history, the buckets were not high tensile metal, or even plated, the shim on top was the hard part, and was fragile and as hard, as glass...
the buckets on the C14 are not "matched" to the bore they sit in, tolerances and metalurgy don't warrent it today, so the buckets "when installed" ar all pulled from a bin, the only precision part is the shim pill.... the buckets rotate during normal use, and furthernreduce any semblence of wear.

there is absolutly no reason any bucket can't be swapped... the clearances are built into the ore they sit in.

if you measure the head thickness as i noted well back in time, you will see they vary greatly, so measuring them all, when you keasure your shims, WILL give you the best possible options for swap vs buy..... you'll see when you pullna couple out, and see no wear at allnon them.

pffft.  just don't grind shims.... that's bad ... mmmmkay
 
You need to consider that swapping the buckets will add a certain level of complexity and confusion to the procedure. I personally was more comfortable only working with the shim measurement variable. IIRC, I was dealing with one shim and one valve at a time to maintain some level of control. So I never had more than one bucket and shim out at a time.

Good tip though, and I think next time I will at least measure and record each bucket thickness just in case I ever change my mind on that or get in a pinch finding the proper shim.
 
4Bikes said:
You need to consider that swapping the buckets will add a certain level of complexity and confusion to the procedure. I personally was more comfortable only working with the shim measurement variable. IIRC, I was dealing with one shim and one valve at a time to maintain some level of control. So I never had more than one bucket and shim out at a time.

Good tip though, and I think next time I will at least measure and record each bucket thickness just in case I ever change my mind on that or get in a pinch finding the proper shim.

I pulled them out, one at a time, and measured and replaced them... just like that....
then sat down with my chart, and worked out what had to change and by how much. it isn't rocket science, just addition and subtaction....

don't remove them all, and try to segregate them, and figure it out. simply measure one by one, what lives where..


people make this soooooo complex. :-[ :-[ :-X

 
Nice write up 4Bikes. I found the same issues as you. Took me a month to do including 2 weeks waiting for shims which no dealer had in stock. Makes me feel like they pencil whip the checks. Ditto on the cam shaft alignment, first time I was off one tooth because as you say they change when you tighten down the camshaft caps. One other thing, make damn sure you temporarily plug the oil return holes in the top of the head! Won't tell you how I know that but I got lucky! The whole thing like you said is use the manual, the videos, everything online & just take your time...

Mark in CT
2012 Arabian Red
 
I knew there was a reason I still have my old C10, here's my valve setting worksheet:

In .005 - .007
Out .007 - .009

:):):))
 
connie_rider said:
Tagging this for future reference.
Gonna have to adjust mine sooner or later...

Ride safe, Ted

I'm tagging it too.  I have my second check coming up soon, so I will be reviewing my notes.  My big change next time will be completely removing the radiator and cleaning it as part of the job.  Also, I'll be measuring and recording the bucket clearances.  Of course I'm hoping that they are all in spec (checked like a dealer ::) ) and the cams won't need to come out. 
 
Copy and save the thread's URL would be one way. Perhaps with your maint records. Don't look for a tag button because it doesn't exist.
 
4Bikes said:
connie_rider said:
Tagging this for future reference.
Gonna have to adjust mine sooner or later...

Ride safe, Ted

I'm tagging it too.  I have my second check coming up soon, so I will be reviewing my notes.  My big change next time will be completely removing the radiator and cleaning it as part of the job.  Also, I'll be measuring and recording the bucket clearances.  Of course I'm hoping that they are all in spec (checked like a dealer ::) ) and the cams won't need to come out.
,the dimension you want to record is the thickness betwween wear face of the top o bucket, and the center raised portion contacting the shim, you will need reliable micrometer for this, but its like $30 from McMaster Carr... don't need digital, wasted bucks, simple normal mic, cheapest one they have. it reads to 4 places, if you understand how to read a mic.
swapping is super usefull, and most people don't understand how it works, but if you sit down, SOBER, and look at the readings on shim thikness, clearance, and bucket head dims...
it should all come clear where youcan swap.


or not.

just fer giggles,mand using the described methods, with data about wht shim number is where, clearance found, and bhcket head thickness... measured ACCURATLY... illnsend you a swap map, and where goes where... for a very minimal price.
 
4Bikes, thanks for all of the insight. I'm closing in on 20K and like many others have made the decision to extend the mileage to 25K before diving in. I wish you or SISF were close by.
 
MAN OF BLUES said:
Sailor_chic said:
Okay, help a dummy please. How do you tag a thread.

you can contact me directly... so I can have you be the Fla expert.... :great:

not on taggin,
just on adjusting.....

I tried this approach and didn't get a response. Even on the second attempt, you replied and said you were busy and would get back to me. 
 
Sailor_chic said:
MAN OF BLUES said:
Sailor_chic said:
Okay, help a dummy please. How do you tag a thread.

you can contact me directly... so I can have you be the Fla expert.... :great:

not on taggin,
just on adjusting.....

I tried this approach and didn't get a response. Even on the second attempt, you replied and said you were busy and would get back to me.

ooops.... sorry, my bad, lemme go back and search emails and see what you sent. :-\
 
Appreciate all of you that had input on this, very useful and educational.  I'm not there yet on mine so I like to school up as much as I can before that time gets here.
 
im going to get a new bike at 25k and let Kawasaki worry about it. 

2010 now with 9200 miles......  well looks like a 2022 model will be in my future!    :great: :))
 
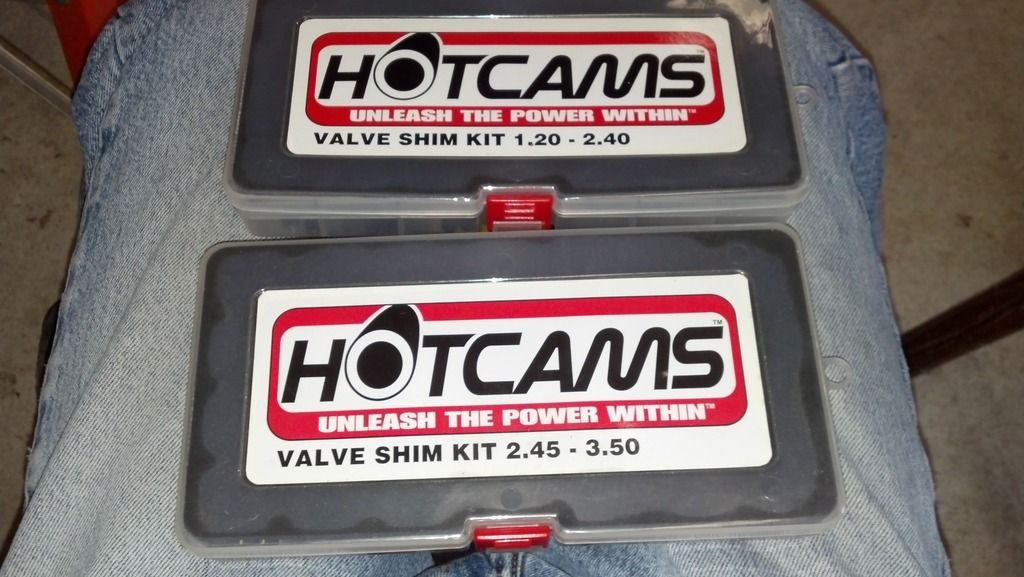
The knock on the hot cams are that the half sizes are missing that are available with the Kawasaki and Honda shims. This means that in some cases you cannot get precise enough to put the clearances at the center or loose end of the specs. The other knock against a complete shim kit is that you may not have the quantity of shims that you need. Most I believe, prefer to swap shims with a dealer, or buy them individually from a source such as Ron Ayres. I had luck with swapping shims with a dealer, but I recommend measuring them as they hand them to you.
 
I purchased mine from a dealer measuring each one with my own calipers to make sure they were spot on
 
MAN OF BLUES said:
Sailor_chic said:
Okay, help a dummy please. How do you tag a thread.


you can contact me directly... so I can have you be the Fla expert.... :great:

not on taggin,
just on adjusting.....

I wouldn't say I'm an expert. I just wasn't scared to tackle this project. I took my time and thought things out. I would have no problem doing another valve shim adjustment again.
 
Top