• Can't post after logging to the forum for the first time... Try Again - If you can't post in the forum, sign out of both the membership site and the forum and log in again. Make sure your COG membership is active and your browser allow cookies. If you still can't post, contact the COG IT guy at IT@Concours.org.
  • IF YOU GET 404 ERROR: This may be due to using a link in a post from prior to the web migration. Content was brought over from the old forum as is, but the links may be in error. If the link contains "cog-online.org" it is an old link and will not work.

What have your done to your C14 today

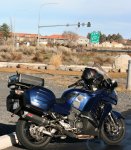
Sun was out so I took a 275+/- mile trek on Sunday – my new ECU (reflash) is the conservative Mountain Runner (Steve’s), so I headed to the mountains (or at least that’s what they call the apple-chain hills) over one way, go a bit south, come back the other way (90-degrees to Skyline drive), get lost, see signs for Richmond, say oops, turn around and head back towards F’burg.  My riding was absolutely terrible – only defense is that it has been 12-15 years since I’ve been over there, and never on a bike with C14 capabilities… on the other hand, the only bike that passed me was a very well ridden KLR… my cornering technique was unique; rather than the old fashions analogue style – smooth trail-brake in, late apex, and power out, was more in the contemporary mode – digital, characterized by multiple apexes, connected with abrupt acceleration, then an OH #$%!! expletive and sharp braking, on to the next incremental apex, more accel/decel and so on – string enough of them together and you can get through any corner…  Surprisingly, my fuel mileage was about 10% better through the day than previous steady riding – most of it spent in 3rd-4th-5th gear rather than droning along, so that was a happy result – I suspect it will be better still when not mistreated so badly, but I’m happy… thankfully the reflash smothered some of the rider-induced-abruptness (or something did), but I didn’t test the 89 octane capability until I was back on the flat…

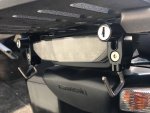
PS -- On a different note; the Kawasaki Touring saddle felt better this go-round (now about 700-750 miles on it (gluteus supremmus may be beating this thing into submission).  It isn’t a BMS or RDL, but I was surprised at the 200 mile point that I was actually reasonably comfortable and all told the day was about 8-8.5 hours in the seat so it will suffice for local riding anyway… the aforementioned Gorilla-tape windshield gasket seems to have done the trick – the V-Stream still vibrates, but not like it was…
 
Finished with a new home for my 2012 C14.  Just completed the epoxy floor last night and it looks GOOD!
 

Attachments

  • Garage_Epoxy_Done1.JPG
    Garage_Epoxy_Done1.JPG
    214.9 KB · Views: 132
  • Garage_Epoxy_Done2.JPG
    Garage_Epoxy_Done2.JPG
    213.5 KB · Views: 120
Hey Jeff....note the title of the topic is NOT: "What have you done to your floor today".  ;)

Kidding of course.  Floor looks great.  Looking forward to hearing how it handles the side and center stand of the bike. 
 
1965soda said:
Hey Jeff....note the title of the topic is NOT: "What have you done to your floor today".  ;)

Kidding of course.  Floor looks great.  Looking forward to hearing how it handles the side and center stand of the bike.
Jack,

I figured some smarty pants like you would chime in on this.  :D  I'll be sure to send you personal updates on how the floor holds up to the wear and tear of a side/center stand.  I suspect I may end up using some material to lessen the impact.
 
runnerb0y said:
Finished with a new home for my 2012 C14.  Just completed the epoxy floor last night and it looks GOOD!

Looks fantastic but no little red and blue flakes?
 
Shizzle said:
runnerb0y said:
Finished with a new home for my 2012 C14.  Just completed the epoxy floor last night and it looks GOOD!

Looks fantastic but no little red and blue flakes?
I decided to go with just the solid color since the floor was in such great shape (new garage).  I helped a buddy do his garage in April and he did the 3 color flakes, it looks good, but it's also sort of distracting.
 
runnerb0y said:
I figured some smarty pants like you would chime in on this.  :D  I'll be sure to send you personal updates on how the floor holds up to the wear and tear of a side/center stand.  I suspect I may end up using some material to lessen the impact.

My floor is painted also, as was my last shop's floor. I use the small rugs used in front of exterior house doors (welcome mats) for the sidestand / centerstands.  I also have some 6"x6" pieces of rubber floor mat that I use for sidestands. HTH, Steve
 
Yep. Easier to find that dropped fastener without flakes I bet.


runnerb0y said:
Shizzle said:
runnerb0y said:
Finished with a new home for my 2012 C14.  Just completed the epoxy floor last night and it looks GOOD!

Looks fantastic but no little red and blue flakes?
I decided to go with just the solid color since the floor was in such great shape (new garage).  I helped a buddy do his garage in April and he did the 3 color flakes, it looks good, but it's also sort of distracting.
 
Steve in Sunny Fla said:
My floor is painted also, as was my last shop's floor. I use the small rugs used in front of exterior house doors (welcome mats) for the sidestand / centerstands.  I also have some 6"x6" pieces of rubber floor mat that I use for sidestands. HTH, Steve

Steve, thanks for the suggestion, I'll probably go that route.  Sounds like a good idea.
 
Kzz1king said:
Yep. Easier to find that dropped fastener without flakes I bet.

Good Point!

Hadn't even thought of that, but as much of a fumble fingers as I am, this will probably be an unintended benefit to the solid color.
 
many moons ago (like 30 years...) I epoxy painted my garage/shop floor, did it in a solid gray, (actually was gonna do flakes, but decided it would be tough to see dropped screws and such...) and kinda liked it... but any liquids made it really slippery... like anything that leaked, or dripped off the car or bike... that part I hated... but, it made for easier "hose down cleanups"..

Pick up some odd "open box"  floor tiles from Lowes, or even carpet squares glued to 1/2" thk plywood,  placing them fabric side down on the floor when you park the bike, with one under each tire, and stand, allows you to easily spin the bike around 360 for ease of storage.. especially as glossy as that looks...

nice job  :beerchug: :beerchug:
 
Road Runner said:
Replaced bike (not FOB) battery. Got nearly 4.5 yrs off old one.

Probably due.. what did ya get?
I do them pretty much every couple years. Having 3 bikes, 2 of which have deceased batt's, I always ask...

Frankly, I wouldn't have bought a new batt at the beginning of winter tho.. just would have pulled it, and mega charged it, nd pulled it out for the winter on a trickle unit inside the house... which is what I'm doing now... trying to save it for spring....

:beerchug: :beerchug: :beerchug: :great: :great: :great: :rotflmao:
 
MAN OF BLUES said:
Road Runner said:
Replaced bike (not FOB) battery. Got nearly 4.5 yrs off old one.

Probably due.. what did ya get?
I do them pretty much every couple years. Having 3 bikes, 2 of which have deceased batt's, I always ask...

Frankly, I wouldn't have bought a new batt at the beginning of winter tho.. just would have pulled it, and mega charged it, nd pulled it out for the winter on a trickle unit inside the house... which is what I'm doing now... trying to save it for spring....

:beerchug: :beerchug: :beerchug: :great: :great: :great: :rotflmao:

Nothing speciall a Parts Unlimited brand I believe. I've been trickle charging the old one for weeks now, but I was starting to see a lot of warnings/ things failing (supposedly), like KTRC, with the weak battery. Living in the Southeast I can still manage to get another 500-750 miles before calendar year end, Jan/Feb are touch-n-go here (north AL). Me, I'll ride down to just above freezing, then cage it 32 F and below.
 
runnerb0y said:
Kzz1king said:
Yep. Easier to find that dropped fastener without flakes I bet.

Good Point!

Hadn't even thought of that, but as much of a fumble fingers as I am, this will probably be an unintended benefit to the solid color.

My last shop floor was white. My new shop has a light blue / green called "seasalt" My wife had chosen this color for the inside of the house, and it's such a nice calming color I painted the shop floor with it. And no flakes ever...eyes, you know. Speaking of that I have 4 8' dual LED lights in the shop - it's lit up like an operating room. The light floor reflects the light really well.
 
Changed my air filter with another OEM one yesterday.  I thought the PO had done this, but recently discovered that wasn't the case.  At 32.8K miles, it was nasty!
 
Installed a new battery.
    Opted to replace the 14 series stocker with a 16 series {more cranking amps}.
    EZ to do.

Ride safe, Ted
 
Removed the muzzy lowering links from my new-to-me 08 because I was scraping pegs to easily here in "no-twistie " Nebraska  :mad: ,... I could only imagine what it would be like running the twisties in Arkansas next spring.  :motonoises:
 
Also thanks to whoever suggested using a two by four to lift rear tire to make removing the bolts easier.  Just another reason $37 for membership is small potatoes for all the tips and good info you can find in this group.  :motonoises:
 
Rideezdale said:
Removed the muzzy lowering links from my new-to-me 08 because I was scraping pegs to easily here in "no-twistie " Nebraska  :mad: ,... I could only imagine what it would be like running the twisties in Arkansas next spring.  :motonoises:
 
Also thanks to whoever suggested using a two by four to lift rear tire to make removing the bolts easier.  Just another reason $37 for membership is small potatoes for all the tips and good info you can find in this group.  :motonoises:

And here I thought I was the only person in Nebraska with a Concours!  I'm in Lincoln, what part of the warm and sunny state do you call home?
 
Eric said:
Rideezdale said:
Removed the muzzy lowering links from my new-to-me 08 because I was scraping pegs to easily here in "no-twistie " Nebraska  :mad: ,... I could only imagine what it would be like running the twisties in Arkansas next spring.  :motonoises:
 
Also thanks to whoever suggested using a two by four to lift rear tire to make removing the bolts easier.  Just another reason $37 for membership is small potatoes for all the tips and good info you can find in this group.  :motonoises:

And here I thought I was the only person in Nebraska with a Concours!  I'm in Lincoln, what part of the warm and sunny state do you call home?

Eric,  I call Fremont home.  Not too far from you. Maybe next spring we can meet up and ride!  :motonoises:

Ride safe
Dale
 
Rideezdale said:
Eric said:
Rideezdale said:
Removed the muzzy lowering links from my new-to-me 08 because I was scraping pegs to easily here in "no-twistie " Nebraska  :mad: ,... I could only imagine what it would be like running the twisties in Arkansas next spring.  :motonoises:
 
Also thanks to whoever suggested using a two by four to lift rear tire to make removing the bolts easier.  Just another reason $37 for membership is small potatoes for all the tips and good info you can find in this group.  :motonoises:

And here I thought I was the only person in Nebraska with a Concours!  I'm in Lincoln, what part of the warm and sunny state do you call home?

Eric,  I call Fremont home.  Not too far from you. Maybe next spring we can meet up and ride!  :motonoises:

Ride safe
Dale

Sounds like a plan! :beerchug:
 
Boy, this rascal puts a smile on yer face -- just got back from a 9-10 day, 4K+/- UHaul trip and it was supposed to rain, so crowded in a short ride... rain started right on time, but got about ten miles of therapeutic, dry road (40F, so felt pretty nippy) before the wet stuff turned me around -- grinning...
:)
 
dcstrng said:
Boy, this rascal puts a smile on yer face -- just got back from a 9-10 day, 4K+/- UHaul trip and it was supposed to rain, so crowded in a short ride... rain started right on time, but got about ten miles of therapeutic, dry road (40F, so felt pretty nippy) before the wet stuff turned me around -- grinning...
:)

For sure re: putting a smile on yer face ... and it will keep it there. I find it still a blast after 66K miles and know others feel the same w/ more miles than me. Enjoy!
 
I actually did it yesterday,..  I rode one last time before changing oil, final drive oil, and topping it off with gas and adding fuel stabilizer in preparation for its long winter nap. :'(
Winter storm warning in effect for today.  :mad:
 
MAN OF BLUES said:
many moons ago (like 30 years...) I epoxy painted my garage/shop floor, did it in a solid gray, (actually was gonna do flakes, but decided it would be tough to see dropped screws and such...) and kinda liked it... but any liquids made it really slippery... like anything that leaked, or dripped off the car or bike... that part I hated... but, it made for easier "hose down cleanups"..

Pick up some odd "open box"  floor tiles from Lowes, or even carpet squares glued to 1/2" thk plywood,  placing them fabric side down on the floor when you park the bike, with one under each tire, and stand, allows you to easily spin the bike around 360 for ease of storage.. especially as glossy as that looks...

nice job  :beerchug: :beerchug:
MOB,

Thanks for the kudos.  The grip on the floor seems to be a bit of a balancing act.  If you get it too rough, it will tend to hold the dirt; if you get it too slick, it becomes an ice-rink when wet.  I think I struck a good balance.  I've done some wet tests and they don't seem too scary.

Be well,
~Jeff
 
gsun said:
Filled it with no ethonol gas, added stabilizer and put her to bed. :'(

Sorry to hear. I'm blessed to lived in SE USA, at least for that reason. Best to you and Happy Thanksgiving all !
 
Sent my ECU off to Steve for the Mtn. Runner Premium flash as a little Christmas present for that special someone - moi ;D
 
Today I removed  the windshield assembly and cleaned/greased  the cables,pulleys and rails. 
While I was that far in to it I removed the instrument cluster and took it apart.
  I did this so I could sharpie the blinding blue high beam indicator light. Say that three times fast lol.

  Here is a helpful video to get you going if you ever need to remove yours.

  https://www.youtube.com/watch?v=n0zK9axWuzc


Installed speed bleeders, purged the lines and was surprised that the dirtiest line was for the rear brake. Granted this was a 2014 that had sat on the dealership floor since new. Installed running lights and topped off coolant.  Next time I'm into that far it will most likely be for the valve check or o-ring replacement. Sitting at 6950 miles 1 year after rescuing her from the dealership.
 
Well, I should've washed my baby, but my Shoodaben Mt. Runner Premium-flashed ECU arrived this afternoon - just in time to let me get in a 70+ mile ride to try it out.  After trying it out, in a word I'm ANGRY . . . that Kawasaki didn't tune the C14 this way at the factory!  Wow - it's like a whole new bike!  I immediately noticed much smoother shifts, especially from 1st to 2nd and 2nd to 3rd.  Engine braking - silky smooth.  More power?  Absolutely, but the way it comes on is as cool as the new found power itself.  Very refined - no micro twist of the throttle and it suddenly lifts the front wheel and rips your arms from their sockets.  So no learning curve needed to adapt to the new power in order to avoid killing yourself.  And what's fun is you don't need to wind it up to take advantage of that extra power.  I always felt the engine had decent power at low rpm, but with the flash I'll get plenty of low rpm grins that weren't there before.  Heck, even twisting the throttle doing 50 in OD sees the speedo needle jump surprisingly fast.

The "Shoodaben" name is perfect, because you just know this is how the engine should perform.  It's not just funner to ride because of the added power, it's also more pleasant to ride because the power comes on smoothly, the bike shifts so much better, and has smoother engine braking as well.  So yeah, while I'm a little mad Kawasaki didn't deliver this performance from the get-go, I'm glad Steve offers such a good remedy for the problem.  Really looking forward to putting on more miles in a variety of riding situations so I can do an actual review on the reviews forum!

Almost forgot to mention I also replaced the stock tool kit with an Oxford Pro kit.  It fits perfectly where the old kit and its plastic box fit and has many more tools.
 
konehead said:
Well it must been a heck of a ride, to post ur review twice.... :)) :)

Ha!  Just noticed that and will take one down.  I guess the flash is like the old Doublemint gum commercials - "double your pleasure - double your fun".
 
Kreton'sLC said:
After trying it out, in a word I'm ANGRY . . . that Kawasaki didn't tune the C14 this way at the factory... The "Shoodaben" name is perfect, because you just know...

Yep, that was my reaction as well (mine is Steve’s non-Premium version), on the other hand I doubt if any manufacturer who engineers one of these would intentionally cut off their own product at the knees if they weren’t strongarmed – from what I read, I’d have to hazard a guess they trying to error on the side of safety -- simply trying to satisfy/placate the EPA/EU petit-deities who can remove or hobble a product at the stroke of a pen, for the transgression of one or two wondering carbon molecules… or an errant decibel.
 
Kreton'sLC said:
Well, I should've washed my baby, but my Shoodaben Mt. Runner Premium-flashed ECU arrived this afternoon - just in time to let me get in a 70+ mile ride to try it out.  After trying it out, in a word I'm ANGRY . . . that Kawasaki didn't tune the C14 this way at the factory!  Wow - it's like a whole new bike!  I immediately noticed much smoother shifts, especially from 1st to 2nd and 2nd to 3rd.  Engine braking - silky smooth.  More power?  Absolutely, but the way it comes on is as cool as the new found power itself.  Very refined - no micro twist of the throttle and it suddenly lifts the front wheel and rips your arms from their sockets.  So no learning curve needed to adapt to the new power in order to avoid killing yourself.  And what's fun is you don't need to wind it up to take advantage of that extra power.  I always felt the engine had decent power at low rpm, but with the flash I'll get plenty of low rpm grins that weren't there before.  Heck, even twisting the throttle doing 50 in OD sees the speedo needle jump surprisingly fast.

The "Shoodaben" name is perfect, because you just know this is how the engine should perform.  It's not just funner to ride because of the added power, it's also more pleasant to ride because the power comes on smoothly, the bike shifts so much better, and has smoother engine braking as well.  So yeah, while I'm a little mad Kawasaki didn't deliver this performance from the get-go, I'm glad Steve offers such a good remedy for the problem.  Really looking forward to putting on more miles in a variety of riding situations so I can do an actual review on the reviews forum!

Almost forgot to mention I also replaced the stock tool kit with an Oxford Pro kit.  It fits perfectly where the old kit and its plastic box fit and has many more tools.

Well said; my sentiments as well re: Steve's MRP flash !  :great:
 
Busy weekend working on the bike... the intent was to get a Rostra cruise control installed. That's only half done....
I have previously installed driving lights, PIAA horns and a fuse block in the tool storage box but some of this was done quickly due to time constraints at the time.
So, I pulled the gas tank for the first time. This gave me the chance to dress the wires properly for the above. I also added a 30 amp relay before the fuse block so it is now switched power rather than direct to the battery. While doing the wiring I added a dual USB plug to the left of the left headlight adjuster and ran 2 additional wires from the fuse block to the front of the bike for the Rostra and camera system. Also, took the opportunity to clean the ground wires and frame next to the battery and put some of the gooey protective conductive paste that MoB recommends on them.
I had originally put the PIAA horns behind the radiator on the left. This was where the Rostra unit was going to go. So I moved the horns to where the stock horn goes. Thanks to Ted (Connie_Rider) for pictures showing how he had mounted his there.
Rostra stuff: Fabricated the switch mount, RTV sealed the switch, put shrink wrap over the length of the switch wires for better protection, mounted the switch by the throttle, mounted the main unit, made and mounted an extension on the throttle arm and installed the Rostra throttle cable support.
Still to do: Get the Rostra wired up, install a 2 camera video recorder (enhancement in case of another accident) and install AST pull-back adapters (already have 2" risers).
Hopefully, the honey and daughter "do's" will hold off for another week and I can get it finished New Years day and next weekend.
 
MtnRider said:
Busy weekend working on the bike... the intent was to get a Rostra cruise control installed. That's only half done....
I have previously installed driving lights, PIAA horns and a fuse block in the tool storage box but some of this was done quickly due to time constraints at the time.
So, I pulled the gas tank for the first time. This gave me the chance to dress the wires properly for the above. I also added a 30 amp relay before the fuse block so it is now switched power rather than direct to the battery. While doing the wiring I added a dual USB plug to the left of the left headlight adjuster and ran 2 additional wires from the fuse block to the front of the bike for the Rostra and camera system. Also, took the opportunity to clean the ground wires and frame next to the battery and put some of the gooey protective conductive paste that MoB recommends on them.
I had originally put the PIAA horns behind the radiator on the left. This was where the Rostra unit was going to go. So I moved the horns to where the stock horn goes. Thanks to Ted (Connie_Rider) for pictures showing how he had mounted his there.
Rostra stuff: Fabricated the switch mount, RTV sealed the switch, put shrink wrap over the length of the switch wires for better protection, mounted the switch by the throttle, mounted the main unit, made and mounted an extension on the throttle arm and installed the Rostra throttle cable support.
Still to do: Get the Rostra wired up, install a 2 camera video recorder (enhancement in case of another accident) and install AST pull-back adapters (already have 2" risers).
Hopefully, the honey and daughter "do's" will hold off for another week and I can get it finished New Years day and next weekend.

So that's what you did Saturday before lunch, right?  What about the rest of the weekend?  ;) :pDT_Armataz_01_37:
 
Kreton'sLC said:
So that's what you did Saturday before lunch, right?  What about the rest of the weekend?  ;) :pDT_Armataz_01_37:

Sat around working on the 3 bottle set of specialty batches Makers Mark that my wife got me for Xmas.    :)
 
MtnRider said:
Kreton'sLC said:
So that's what you did Saturday before lunch, right?  What about the rest of the weekend?  ;) :pDT_Armataz_01_37:

Sat around working on the 3 bottle set of specialty batches Makers Mark that my wife got me for Xmas.    :)

Perfect!  If you don't treat yourself right, who will?
 
Sat around working on the 3 bottle set of specialty batches Makers Mark that my wife got me

Niiice! I'm a 4 Roses guy m'self.

Anyhooo, what with a freak warm front blowing in mid to upper 50's and recently rain washed roads I rode to the local Polar Plunge event as I have for three years now. (It was 24 degrees and snowing the first time I attended and the FD had to K-12 through 8 inches of ice.) Put in a couple of gallons of fresh non ethanol premium, even wiped a layer of dust and bugs off, tried to rouse a couple of riding buddies out of bed (BMW riders, no luck rousing them) and no, I don;t jump in the water.

Always a very large cruiser turnout, I roll with a group from the local VFW and an ex co-worker of my wife's as well as a bunch of guys I used to work with. Had 2 other "Sporty" bikes, my K-bike buddy dd show up about 3 minutes after it was over, and a few Can-Am's. Saw a sweet old Chevy with a fine patina, I grew up in our '49 Chevy "Ol Blue" so have a soft spot for them.

After the short event in 57 degree air, I am sure the water was colder), I took he long way home through a few corners minding the grit very cautiously but still liking the Dunlop RS3 feel and feedback. Got home and started a jig saw puzzle with the wife. It was a good day.
 

Attachments

  • IMG_8090.JPG
    IMG_8090.JPG
    297 KB · Views: 118
  • IMG_8108.JPG
    IMG_8108.JPG
    337 KB · Views: 103
  • IMG_8125.JPG
    IMG_8125.JPG
    347.1 KB · Views: 103
The non-bike stuff related to the above...
 

Attachments

  • IMG_8147.JPG
    IMG_8147.JPG
    305.1 KB · Views: 96
  • IMG_8129.JPG
    IMG_8129.JPG
    145.8 KB · Views: 97
  • IMG_8111.JPG
    IMG_8111.JPG
    340.5 KB · Views: 93
  • IMG_8101.JPG
    IMG_8101.JPG
    317.8 KB · Views: 97
Performed annual air filter change and semi-annual oil & oil filter change. Fortunately for winter here in N. AL right now it's not bad at all so will get the bike out for a while tomorrow. Lucky me. Hope all is having a Happy New Year!
 
At 34.5K Miles decided to check the valve clearance.  After removing all the appro. skins and following Fred Harmon's DVD, which is great by the way.  It is particularly good when you can play it back at 1.4 to 2.0 speed which retains the voice over but moves things along more quickly. I found Fred's voice too soothing to watch for long without getting sleepy while holding a wrench, lol.

With all that, it turns out that literally all tolerances/gaps for intake were between .005"-.006" and exhaust gaps were all .008" to .009" but for the #1 cylinder outboard exhaust valve which indicated .0075"; not enough to justify pulling the cam to do a shim change, IMO.  So, I buttoned it all up using the gasket parts from Murph's, then took the opportunity to do a bit of wiring neatening up. 

Thankfully it all went back together well and runs the same as before with the additional peace of mind that the valves are in good order and I saved several large by doing it myself.  BTW, I say doing it myself but really I have to thank my Son, Zach for his help and guidance since he has done valve adjustments on his Turbo Busa and knows his way around things like cylinder heads and such more than I do.  The last time I pulled the head off a motor was when I had a Hodaka Super Rat in the '60s, therefore no valves since it was a 2 stroke...

I guess next will be the front steering bearings and fork oil change...
Cheers!
Gilbysan, aka- Fat Ninja


gilbysan said:
At 34.5K Miles decided to check the valve clearance.  After removing all the appro. skins and following Fred Harmon's DVD, which is great by the way.  It is particularly good when you can play it back at 1.4 to 2.0 speed which retains the voice over but moves things along more quickly. I found Fred's voice too soothing to watch for long without getting sleepy while holding a wrench, lol.

With all that, it turns out that literally all tolerances/gaps for intake were between .005"-.006" and exhaust gaps were all .008" to .009" but for the #1 cylinder outboard exhaust valve which indicated .0075"; not enough to justify pulling the cam to do a shim change, IMO.  So, I buttoned it all up using the gasket parts from Murph's, then took the opportunity to do a bit of wiring neatening up. 

Thankfully it all went back together well and runs the same as before with the additional peace of mind that the valves are in good order and I saved several large by doing it myself.  BTW, I say doing it myself but really I have to thank my Son, Zach for his help and guidance since he has done valve adjustments on his Turbo Busa and knows his way around things like cylinder heads and such more than I do.  The last time I pulled the head off a motor was when I had a Hodaka Super Rat in the '60s, therefore no valves since it was a 2 stroke...

I guess next will be the front steering bearings and fork oil change...
Cheers!
Gilbysan, aka- Fat Ninja
Good work Gilbysan! I was skeered the first time, but it's not so bad, getting the body work off was the hardest part. I changed my final drive oil for the first time today, it took seemingly very little to refill it, maybe 5-6 oz, does that seem right? Man it was icky gray and dirty, put Lucas synthetic 75-90w in it. The manual says about every other pill change but i may do it every time ifv that's all it uses, sure doesn't take long.
 
gilbysan said:
. . . I found Fred's voice too soothing to watch for long without getting sleepy while holding a wrench, lol. . .

Yes, his voice is "calming" to say the least - great vids though!
 
HR,
You are correct, the final drive heavy oil res. does not take very much at all to refill once you drain out the old sludge.  I guess it can't hurt to change it out more often than the stated service interval.  It is a really important part of the drive train so why not take extra care of it. 

I have taken the the skins of Connie so many times in the last 30K+ miles that the screws seem to know their places without me having to think about it anymore.  The issue is replacing those pesky rubber well nuts when they wear out.
Safe Riding!
Gilbysan, aka - Fat Ninja
 
Received my TPMS sensors back today with fresh batteries. This saved me a small fortune at the dealer for new sensors and programing.  I got it all back together and off the jack safely and quite easily, this is the easiest bike I've owned for wheels/brakes/removal maintenance. Still dislike the plastic removal though.
  A huge thank you to Fred for the extremely fast work and return, also nice to deal with folks that do what they say and say what they do. :great:  I'm back on the road.
 
gilbysan said:
At 34.5K Miles decided to check the valve clearance.  After removing all the appro. skins and following Fred Harmon's DVD, which is great by the way.  It is particularly good when you can play it back at 1.4 to 2.0 speed which retains the voice over but moves things along more quickly. I found Fred's voice too soothing to watch for long without getting sleepy while holding a wrench, lol.

With all that, it turns out that literally all tolerances/gaps for intake were between .005"-.006" and exhaust gaps were all .008" to .009" but for the #1 cylinder outboard exhaust valve which indicated .0075"; not enough to justify pulling the cam to do a shim change, IMO.  So, I buttoned it all up using the gasket parts from Murph's, then took the opportunity to do a bit of wiring neatening up. 

Thankfully it all went back together well and runs the same as before with the additional peace of mind that the valves are in good order and I saved several large by doing it myself.  BTW, I say doing it myself but really I have to thank my Son, Zach for his help and guidance since he has done valve adjustments on his Turbo Busa and knows his way around things like cylinder heads and such more than I do.  The last time I pulled the head off a motor was when I had a Hodaka Super Rat in the '60s, therefore no valves since it was a 2 stroke...

I guess next will be the front steering bearings and fork oil change...
Cheers!
Gilbysan, aka- Fat Ninja

I waited till 46K miles. I was going to wait till 50-60K but the broken star springs made the choice to have the valves checked during that repair. 3 exhaust were tight, but not dangerously so. Had them done and the SS service.

Except for oil changes and brake fluid service I do on my own I am not going to worry about any other potential maintenance. Cheers and beers!
 
HeavyRotation said:
gilbysan said:
At 34.5K Miles decided to check the valve clearance.  After removing all the appro. skins and following Fred Harmon's DVD, which is great by the way.  It is particularly good when you can play it back at 1.4 to 2.0 speed which retains the voice over but moves things along more quickly. I found Fred's voice too soothing to watch for long without getting sleepy while holding a wrench, lol.

With all that, it turns out that literally all tolerances/gaps for intake were between .005"-.006" and exhaust gaps were all .008" to .009" but for the #1 cylinder outboard exhaust valve which indicated .0075"; not enough to justify pulling the cam to do a shim change, IMO.  So, I buttoned it all up using the gasket parts from Murph's, then took the opportunity to do a bit of wiring neatening up. 

Thankfully it all went back together well and runs the same as before with the additional peace of mind that the valves are in good order and I saved several large by doing it myself.  BTW, I say doing it myself but really I have to thank my Son, Zach for his help and guidance since he has done valve adjustments on his Turbo Busa and knows his way around things like cylinder heads and such more than I do.  The last time I pulled the head off a motor was when I had a Hodaka Super Rat in the '60s, therefore no valves since it was a 2 stroke...

I guess next will be the front steering bearings and fork oil change...
Cheers!
Gilbysan, aka- Fat Ninja
Good work Gilbysan! I was skeered the first time, but it's not so bad, getting the body work off was the hardest part. I changed my final drive oil for the first time today, it took seemingly very little to refill it, maybe 5-6 oz, does that seem right? Man it was icky gray and dirty, put Lucas synthetic 75-90w in it. The manual says about every other pill change but i may do it every time ifv that's all it uses, sure doesn't take long.

I change the rear drive oil every oil change at 3K miles. Its overkill but so what. I use Redline 75-90 synthetic gear oil for mine. The 1st couple of rear drive oil changes the oil was somewhat dark and metallic looking. Not anymore. Clean every time now. I fill it while spinning the tire backwards so the gear oil is drawn into the drive. I then stop it and wait for the oil to level, if its starts to overflow and drip out the fill hole I know its topped off. I use a small squirt bottle with the gear oil in it.
 
Oil change and rear drive oil. Like a previous poster, the first 2-3 changes the rear drive oil was black. Still amber yesterday.
 
Triple-flushed the old coolant and filled it back up with Steve's cooling cocktail.  When feeling the radiator hose to see if the engine has warmed enough to circulate coolant, have you ever discovered how similar a header pipe can look to the hose in a dimly lit garage?  :-\
 
Waiting on my rebuilt forks and Penske rear, so decided to strip for cleaning and coolant change. Had the exhaust pipe off for a week and kinda forgot about it. Installed the battery and fired her up to circulate the juice and WOW, he is loud without the muffler...I think I pooped a little.

Got some earplugs and let it get warmed up, all is good. Now come on Mr UPS man!
 
Mounted a  black Givi 30l Dolomiti top case in preparation for a 6000 mile round trip to the National Rally in Vancouver, Washington this summer.
 

Attachments

  • givi.jpg
    givi.jpg
    19.1 KB · Views: 99
Did you ship the forks out somewhere? Curious as to shipping costs


ZXtasy said:
Waiting on my rebuilt forks and Penske rear, so decided to strip for cleaning and coolant change. Had the exhaust pipe off for a week and kinda forgot about it. Installed the battery and fired her up to circulate the juice and WOW, he is loud without the muffler...I think I pooped a little.

Got some earplugs and let it get warmed up, all is good. Now come on Mr UPS man!
 
After reading all the posts about the problems with rear brakes on bikes with ABS I bled the front and rear brakes a couple of times.  The fluid from the rear was dark, about the color or a light maple syrup, the front was quite a bit lighter in color.  Changed the battery in the front TPMS and put on a Michelin Road 5, can't keep waiting for the GT to be released.
 
Did you ship the forks out somewhere? Curious as to shipping costs
Yes, I shipped them across half the state of WA to KFG Motorsports, the 'local' suspension magicians. Bought an 11.00 padded shotgun case at Walmart, added additional stabilizers of cardboard tubes and a bit more foam. Weight was about 11 pounds, but the odd shape added cost. Shipping was only 40 dollars....until added insurance to the amount of 2200.00, then it went up to 90.00.
 
Thanks


ZXtasy said:
Did you ship the forks out somewhere? Curious as to shipping costs
Yes, I shipped them across half the state of WA to KFG Motorsports, the 'local' suspension magicians. Bought an 11.00 padded shotgun case at Walmart, added additional stabilizers of cardboard tubes and a bit more foam. Weight was about 11 pounds, but the odd shape added cost. Shipping was only 40 dollars....until added insurance to the amount of 2200.00, then it went up to 90.00.
Maybe you already said but I didn't see, what are you having done to the forks? I did new stock rate springs, seals and oil. Feels ok until pushed then it feels like the front end isn't tracking well over rough pavement especially in transition 'at speed'. Not terribly confidence inspiring, especially with the rear being so underdamped on the high speed circuit. The Penske should be nice upgrade, 2 or 3 clicker? I rode mine to work today, as usual.
 
Pulled it out of hibernation.  57 degrees.
Getting it ready for the first rally of the year.
HMR #7
 
Put the plastics back on!! Before I forget how. Still will be about 2 weeks before I can get the reworked forks back on and have to time to finish it. But getting closer, and warmer!
 
Wired in a outlet to run a heated jacket-liner... ten times more fiddly-diddly stuff than any other bike I've had and then had to lengthen it to boot, but oh well... looks like it'll work now that it is warming up a bit... hmmmm...
 
Ordered a replacement dual helmet lock after the one on my C14 survived a not-so-brute force attack. Some goon tried to steal my lid while it was on the bike in a parking garage. The lock (from ProjektD) repelled the attack but suffered some damage so a replacement was ordered and swapped out soon enough.
 
I gave my 2014 C-14 a detail and wax job.
I know the first batch of bugs will negate that work but she sure does looks sharp now!
I'm curious when I wear out my RS3 tires, I'm going to put on some RS2's
 
Finally had to replace the original OEM battery on my 2012. Replaced it with the exact same OEM battery as it must be a great battery to last 8 years. Lasted 8 years with no problems (I believe) due to the fact it has always been on a "Battery Tender".
 
Bled the brakes again. All clear fluid front and rear. Feared the 2 year old Z900RS w/ABS might suffer from the dirty fluid that the C14 rear brakes had, but all clear fluid front and rear.
 
I sent a deposit for my first C14 250 miles away. 2011 Silver 14K miles Plan to meet and bring it home this weekend. And registered on this forum.
 
Carl RF
Welcome
Try and find out if the ECU has been "Flashed"
If not you'll want to do that first thing IMHO
I bought my 2014 C-14 from Grand Junction Powersports last June.
Love that C-14!!
 
Carlrf said:
I sent a deposit for my first C14 250 miles away. 2011 Silver 14K miles Plan to meet and bring it home this weekend. And registered on this forum.
Congratulations on the new ride.  If you want all that COG has to offer, drop the $37 for a full membership (we are more than just a forum).  You'll get access to tech info that forum only members don't get to see, plus the highly rated Concourier magazine and the ever valuable COG membership handbook that has all the paying members contact info.  In that book you find folks that will help you out when you have a problem, all over the country.  Better than AAA.  Join up and help COG continue to help you!  Welcome! :beerchug:
 
Replaced the helmet locks after some rat tried to steal my lid.

The lock did its job and resisted the attack. Pictures included.
 

Attachments

  • IMG_2947-2.jpg
    IMG_2947-2.jpg
    176 KB · Views: 126
  • IMG_2955-2.jpg
    IMG_2955-2.jpg
    193.4 KB · Views: 125
jonesey2791 said:
Replaced the helmet locks after some rat tried to steal my lid.

The lock did its job and resisted the attack. Pictures included.

Nothing better than doing freelance dental work on a thief caught in the act or found shortly thereafter with the goods. Unfortunately the option of volunteering to remove teeth from the appropriate individuals  does not present itself nearly often enough relative to the requests for removal.
 
Now have my front forks rebuilt and was going to install the front wheel & calipers and bleed the front brakes, etc. but also decided to do a few other things first :  1.)  Check the tightness of the exhaust manifold nuts  2.)  Replace the exhaust cam position sensor o-ring with the MOB o-ring ( it's slightly thicker than the OEM o-ring, BTW) 3.)  Install dual horns that actually sound like a horn and not the Road Runner.

So I removed the three radiator mounting bolts so I could get a little more room to work.  Actually, I also removed the right fan so I could get my hand in there between the radiator and exhaust cam sensor and manifold nuts.

All the exhaust manifold nuts needed a little snugging down ( about 18K miles on the bike ), especially the ones for cylinder #3.

The exhaust cam sensor was seeping a little oil down onto the exhaust pipe so the MOB o-ring should take care of that problem.  I thought I could smell a little oil burning after starting the bike after it had set for awhile.  I lubed the o-ring with some dielectric grease before I installed it onto the sensor.  It slipped right into the hole without any problem.

Looks like I will use the OEM horn mounting bracket and just add a strap to it and mount the new horns to the new strap.  I'll install a relay to power the new horns and fuse the new circuit at 15 amps.  I'll change the OEM horn fuse from 10 amps to 3 amps and use that circuit to power the coil of the new relay.

Then I'll get the front end stuff re-mounted and move onto a valve check & adjust, I'm sure.
 
IBAJIM said:
[size=10pt]Now have my front forks rebuilt and was going to install the front wheel & calipers and bleed the front brakes, etc. but also decided to do a few other things first :  1.)  Check the tightness of the exhaust manifold nuts  2.)  Replace the exhaust cam position sensor o-ring with the MOB o-ring ( it's slightly thicker than the OEM o-ring, BTW) 3.)  Install dual horns that actually sound like a horn and not the Road Runner. 4.)  Install the Fender Extender I bought last year - almost forgot about it.

So I removed the three radiator mounting bolts so I could get a little more room to work.  Actually, I also removed the right fan so I could get my hand in there between the radiator and exhaust cam sensor and manifold nuts.

All the exhaust manifold nuts needed a little snugging down ( about 18K miles on the bike ), especially the ones for cylinder #3.

The exhaust cam sensor was seeping a little oil down onto the exhaust pipe so the MOB o-ring should take care of that problem.  I thought I could smell a little oil burning after starting the bike after it had set for awhile.  I lubed the o-ring with some dielectric grease before I installed it onto the sensor.  It slipped right into the hole without any problem.

Looks like I will use the OEM horn mounting bracket and just add a strap to it and mount the new horns to the new strap.  I'll install a relay to power the new horns and fuse the new circuit at 15 amps.  I'll change the OEM horn fuse from 10 amps to 3 amps and use that circuit to power the coil of the new relay.

EDIT: Didn't need to install a relay - that saved me some work.  The OEM horn was marked "3 A."  Each of the new Hella "Motorcycle Disc Horn" are a little smaller in diameter than the OM horn and each is marked "1.5A".  The spec on the box is "2x16W" which is about 1.5 Amps each.  So I'm using the original wiring and fuse - the total amps is the same as the single OEM horn.  One horn is 380 Hz and the other is 480 Hz and the total dB rating is 108 dB(A).  The OM horn is stamped 105 dB.  So they are a bit louder,  but the dual horns have a better sound, IMO.

BTW, the Hella PN on the box is 012588011.

I also installed a 1A/2.1A  USB power outlet that also has a built-in DVM that monitors the input voltage.

Then I'll get the front end stuff re-mounted and move onto a valve check & adjust, I'm sure.
[/size]
 
IBAJIM said:
IBAJIM said:
Now have my front forks rebuilt and was going to install the front wheel & calipers and bleed the front brakes, etc. but also decided to do a few other things first :  1.)  Check the tightness of the exhaust manifold nuts  2.)  Replace the exhaust cam position sensor o-ring with the MOB o-ring ( it's slightly thicker than the OEM o-ring, BTW) 3.)  Install dual horns that actually sound like a horn and not the Road Runner. 4.)  Install the Fender Extender I bought last year - almost forgot about it.


So I removed the three radiator mounting bolts so I could get a little more room to work.  Actually, I also removed the right fan so I could get my hand in there between the radiator and exhaust cam sensor and manifold nuts.

All the exhaust manifold nuts needed a little snugging down ( about 18K miles on the bike ), especially the ones for cylinder #3.

The exhaust cam sensor was seeping a little oil down onto the exhaust pipe so the MOB o-ring should take care of that problem.  I thought I could smell a little oil burning after starting the bike after it had set for awhile.  I lubed the o-ring with some dielectric grease before I installed it onto the sensor.  It slipped right into the hole without any problem.

Looks like I will use the OEM horn mounting bracket and just add a strap to it and mount the new horns to the new strap.  I'll install a relay to power the new horns and fuse the new circuit at 15 amps.  I'll change the OEM horn fuse from 10 amps to 3 amps and use that circuit to power the coil of the new relay.

EDIT: Didn't need to install a relay - that saved me some work.  The OEM horn was marked "3 A."  Each of the new Hella "Motorcycle Disc Horn" are a little smaller in diameter than the OM horn and each is marked "1.5A".  The spec on the box is "2x16W" which is about 1.5 Amps each.  So I'm using the original wiring and fuse - the total amps is the same as the single OEM horn.  One horn is 380 Hz and the other is 480 Hz and the total dB rating is 108 dB(A).  The OM horn is stamped 105 dB.  So they are a bit louder,  but the dual horns have a better sound, IMO.

BTW, the Hella PN on the box is 012588011.

I also installed a 1A/2.1A  USB power outlet that also has a built-in DVM that monitors the input voltage.

EDIT:  Glued & screwed a Fender Extender on the front fender last night & mounted the fender today.

Now to mount the new tire on the rim, have it spin-balanced at my local independent MC shop and finish up on the front end.
 
Jethrobolas said:
jonesey2791 said:
Replaced the helmet locks after some rat tried to steal my lid.

The lock did its job and resisted the attack. Pictures included.

Nothing better than doing freelance dental work on a thief caught in the act or found shortly thereafter with the goods. Unfortunately the option of volunteering to remove teeth from the appropriate individuals  does not present itself nearly often enough relative to the requests for removal.

:)) :)) :)) :)) :)) :)) :TPIWWP: :1rij: :1rij: :1rij: :021: :13: :You_Rock_Emoticon: :campfire: :clap: :clap: :singing:

I'll be 65 in 4 days... and I've never enjoyed anything so much in life, as making an impact... on someone's stupid life.. now mind you, I never, ever,  looked for confrontation, and I'm a very passive person..  but my wife has seen the results a couple times, and is always amazed.. and to think I always talked her son out of "physical confrontations many times.. "... only to have to rescind on what I just lectured him about seconds ago, when he followed my order... go figure..

now... never hit anyone in the mouth... you will cut your fingers, and get germs.. big hard rib "shots" and broken Knees.. are where it's at.. semper Fi....

:)) :)) :))
 
Just installed my pathfinders finally. Regarding the heatsink. Are people tightening the set screw or just rotating the heatsink til it's tight and calling it a day. I wondered if that's what that wave washer is for, kinda like a lock washer. Also had a time figuring out where to install the wiring/resister/black box etc. Left side I tucked behind the windscreen regulator and the right I velcro'd it to the side and tucked wiring away. Nothing touches when turning the bars lock to lock or able to chat anything as that was my biggest concern.  It took way longer than I expected  :-/
 
IBAJIM said:
Now have my front forks rebuilt and was going to install the front wheel & calipers and bleed the front brakes, etc. but also decided to do a few other things first :  1.)  Check the tightness of the exhaust manifold nuts  2.)  Replace the exhaust cam position sensor o-ring with the MOB o-ring ( it's slightly thicker than the OEM o-ring, BTW) 3.)  Install dual horns that actually sound like a horn and not the Road Runner. 4.)  Install the Fender Extender I bought last year - almost forgot about it.


So I removed the three radiator mounting bolts so I could get a little more room to work.  Actually, I also removed the right fan so I could get my hand in there between the radiator and exhaust cam sensor and manifold nuts.

All the exhaust manifold nuts needed a little snugging down ( about 18K miles on the bike ), especially the ones for cylinder #3.

The exhaust cam sensor was seeping a little oil down onto the exhaust pipe so the MOB o-ring should take care of that problem.  I thought I could smell a little oil burning after starting the bike after it had set for awhile.  I lubed the o-ring with some dielectric grease before I installed it onto the sensor.  It slipped right into the hole without any problem.

Looks like I will use the OEM horn mounting bracket and just add a strap to it and mount the new horns to the new strap.  I'll install a relay to power the new horns and fuse the new circuit at 15 amps.  I'll change the OEM horn fuse from 10 amps to 3 amps and use that circuit to power the coil of the new relay.

EDIT: Didn't need to install a relay - that saved me some work.  The OEM horn was marked "3 A."  Each of the new Hella "Motorcycle Disc Horn" are a little smaller in diameter than the OM horn and each is marked "1.5A".  The spec on the box is "2x16W" which is about 1.5 Amps each.  So I'm using the original wiring and fuse - the total amps is the same as the single OEM horn.  One horn is 380 Hz and the other is 480 Hz and the total dB rating is 108 dB(A).  The OM horn is stamped 105 dB.  So they are a bit louder,  but the dual horns have a better sound, IMO.

BTW, the Hella PN on the box is 012588011.

I also installed a 1A/2.1A  USB power outlet that also has a built-in DVM that monitors the input voltage.

EDIT:  Glued & screwed a Fender Extender on the front fender last night & mounted the fender today.

Now to mount the new tire on the rim, have it spin-balanced at my local independent MC shop and finish up on the front end.

EDIT:  Decided to wait a while for the weather to warm up before I mount the tire.  It should be easier to mount then.

Began to remove all the stuff so I can get at the cam cover and do the valve check.  The 10 mm hex head bolt that secures the bottom of the right side engine/frame brace to the engine was very, very tight.  I couldn't budge it with my impact wrench.  Why they use the red locktite is beyond me.  I think the blue would do the job just fine.    I was concerned that I might strip the female hex socket on the bolt.  I was able to move the radiator forward after removing the three radiator mounting bolts and get a propane torch in from the left side.  after heating the end of the bolt for about a minute,  it spun right out - probably could have loosened it with a 3/8 inch drive ratchet.  I re-tapped the threads in the engine ( 10mm x 1.25mm ) to be on the safe side.  And I'll replace that hex bolt and use blue locktite when I re-assemble.

Oh yeah, also removed the CSS-100 servo and vacuum canister.  Will be replacing it with a Rostra.

I'm at the point where I'll be removing the stick coils & intake camshaft position sensor and then be able to remove the cam cover.
 
Installed Full AreaP Exhaust and upgraded flash from Stock to the newly revised AreaP.

Report: There is no comparison!  Super Smooth power throughout entire RPM range.  Can’t say I noticed any lag down low and top end is outstanding  :) . I am an enthusiast - not a bounce off the limiter type, however, stock over 8K she was pretty flat, now constant full pull until you get off it!

Anyone on the fence for this performance upgrade - totally worth it!  Can’t wait to hit the twisties and mountains!
 
Test rode her for the first time since Jan. 7th. Other than a coolant change only mods to evaluate were the set up to order Penske 8983 Rear shock, and rebuilt/valved/re-sprung set up to my weight and riding style forks from KFG Motorsports.

I am very pleased with the baseline settings, but know I can dial them in a bit better as I get some miles on them. My real world test indicators are two bumps I see once or twice a day to/from work that normally bottomed out the rear. Now she just floats over them. Under 40 on some of the rougher roads it did feel a tad rougher, but then they are set up for faster cornering manners. Only a couple I could take at 45 degree temps and the roads sandy, but the bike feels more planted and on rails under speed and lean. No wallowing yet.

Only little snag in the fork transaction was one of the stock rebound adjuster knobs was broken into many pieces when I unpacked them. The sender owned up and said would replace but they are not easily obtained I fear. Decided to just 3D print some easier to adjust ones. All good!
 

Attachments

  • small1.jpg
    small1.jpg
    259.2 KB · Views: 116
Last Monday, new front brake pads.  It defiantly needed them with one of the pads having almost none of the wear lines left.  I swapped them from left to right at 21,500 miles and just changed them at 27,500 miles.  I'll swap them again, left to right at 41,000 miles.
 
Wash and wax, put on a new VistaCruze. Do any of you guys have a deer whistle and if so where did you locate it? Im thinking the underside of the right hand mirror but i think ive seen them on the side of front fenders. Ideas?
 
Heavy Ro-Tatio...I run WTF Whistles, (WTF, they may or may not work but for 5 bucks i'll try it.) I think they are supposed to be used in pairs. I put them on the underside of the small plastic trim plate held by 4 pushpins just under the chinny chin chin of the headlights. It comes on and off easily by itself so I spaced them as far apart as I could and used double sided tape with one small flat head screw. (Mine had 3 countersunk holes in the base and the actual whistler slides in and out. Will try to get pics and post tonight.

They also work fantastic on deer, moose, elephants, alpacas, water buffalo, tribbles, Venusian Snarktards, and hot young women. I have not 'hit' any of these since I have been running them on my bikes starting back in about 1987.
 
ZXtasy said:
locating pic
Cool man, that's the one ive got, figured it couldn't hurt. Looked at that spot too, wasn't sure if the fender would hit them at full compression, i ride some pretty rough roads. I had a really close call with a deer last week.
 
Got a flat tire on the way home from an event the other night.

No it's looking sad waiting for me to get in there and inspect to see if I can fix it or need to replace it.
 
Picked up my 2014 C-14 from my mechanic.
He adjusted my valves, all 16 needed adjusting, now there all on the slightly loose side of spec range.
New  sparkplugs plugs
New airfilter
Throttle bodies synced
Coolant Change
Corona virus can't catch me now!
He did all this only charging me 6 hrs labor total which I thought was great!
He's owned this bike and knows the motor.
 
Top